This is the English tutorial with English screenshots. 查看中文版教程 →
How to Reinstall Windows 11 on a Snapdragon PC with the uqitong ARM64 USB Creator
Prepare a bootable recovery drive, start your Snapdragon PC in uqitong ARM PE, deploy Windows 11 ARM64, connect to Wi-Fi, and finish the required Windows updates.
Video walkthrough
Watch the complete video first, then follow the illustrated checks below for the image, USB drive, and Windows target partition.
Read this before you begin
- Creating the bootable drive erases the entire selected USB flash drive.
- Selecting “Format target” during installation erases the selected Windows partition.
- The system image must be Windows 11 ARM64, not a standard x64 image for an Intel or AMD PC.
- Connect AC power and verify every disk, partition, and image selection before confirming.
Before You Begin
You will need:
- A supported Snapdragon-based Windows PC.
- A USB flash drive that can be completely erased. A 16 GB or larger drive is a practical choice for most Windows images.
- A working Windows computer on which to run the USB creator.
- A Windows 11 ARM64 ISO, WIM, ESD, or SWM image from Microsoft or another source you trust.
- A backup of every file you want to keep, including anything on the USB drive and the Windows partition you plan to reinstall.
- AC power connected to the target PC throughout the installation.
There are two separate erase points in this process:
- Creating the bootable drive erases the entire selected USB flash drive.
- Selecting Format target during installation erases the selected Windows partition.
Architecture matters: This guide is for supported Qualcomm Snapdragon/ARM64 Windows PCs. Do not use a standard x64 Windows image intended for Intel or AMD computers. The screenshots show creator version 10.0.0.15; use the current English ARM64 release offered on the official website.
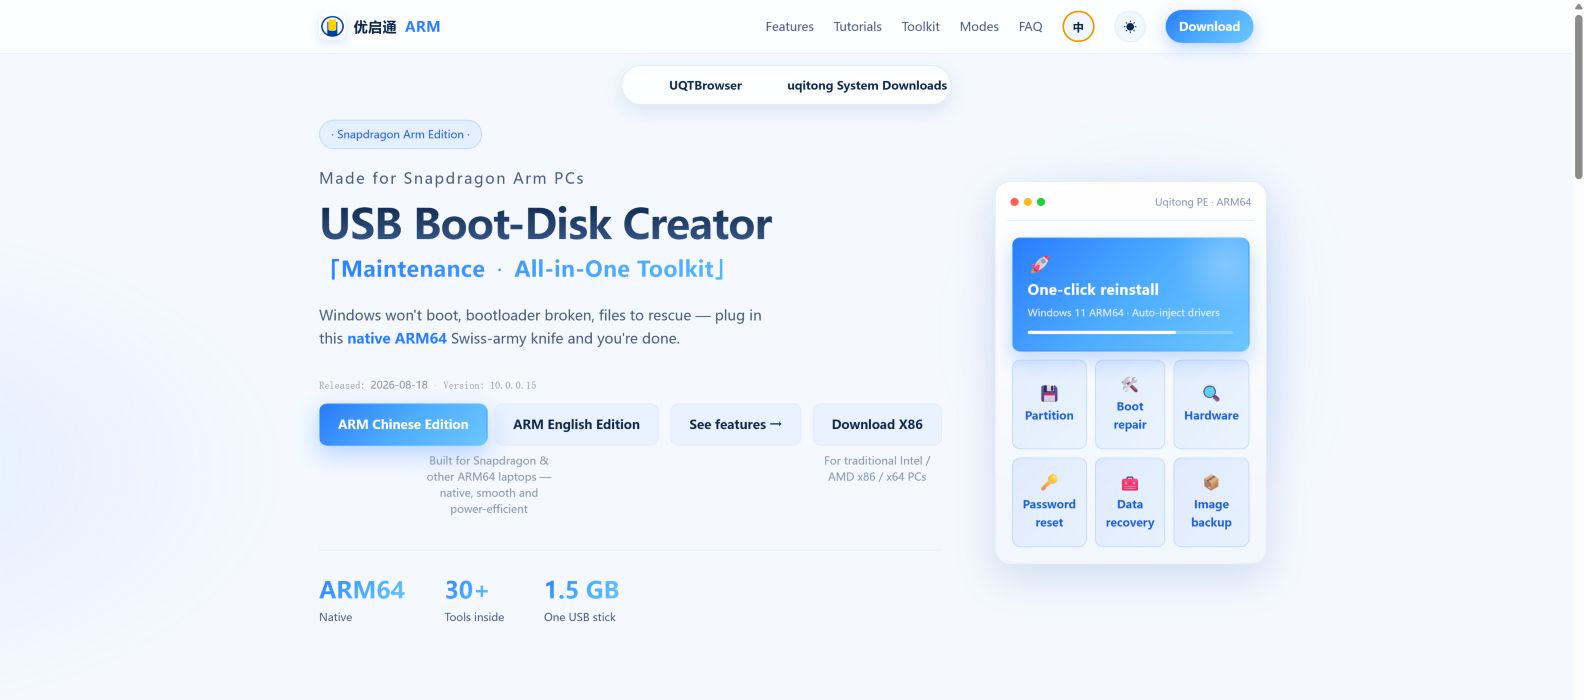
1. Download the English ARM64 USB Creator
Open the official uqitong ARM website. If the page opens in Chinese, select EN in the header, then choose the English ARM download for Snapdragon-based computers.
Do not select the x86 edition for this procedure. The x86 download is intended for traditional Intel/AMD PCs, while this guide requires the ARM64 edition.
2. Create the Bootable USB Flash Drive
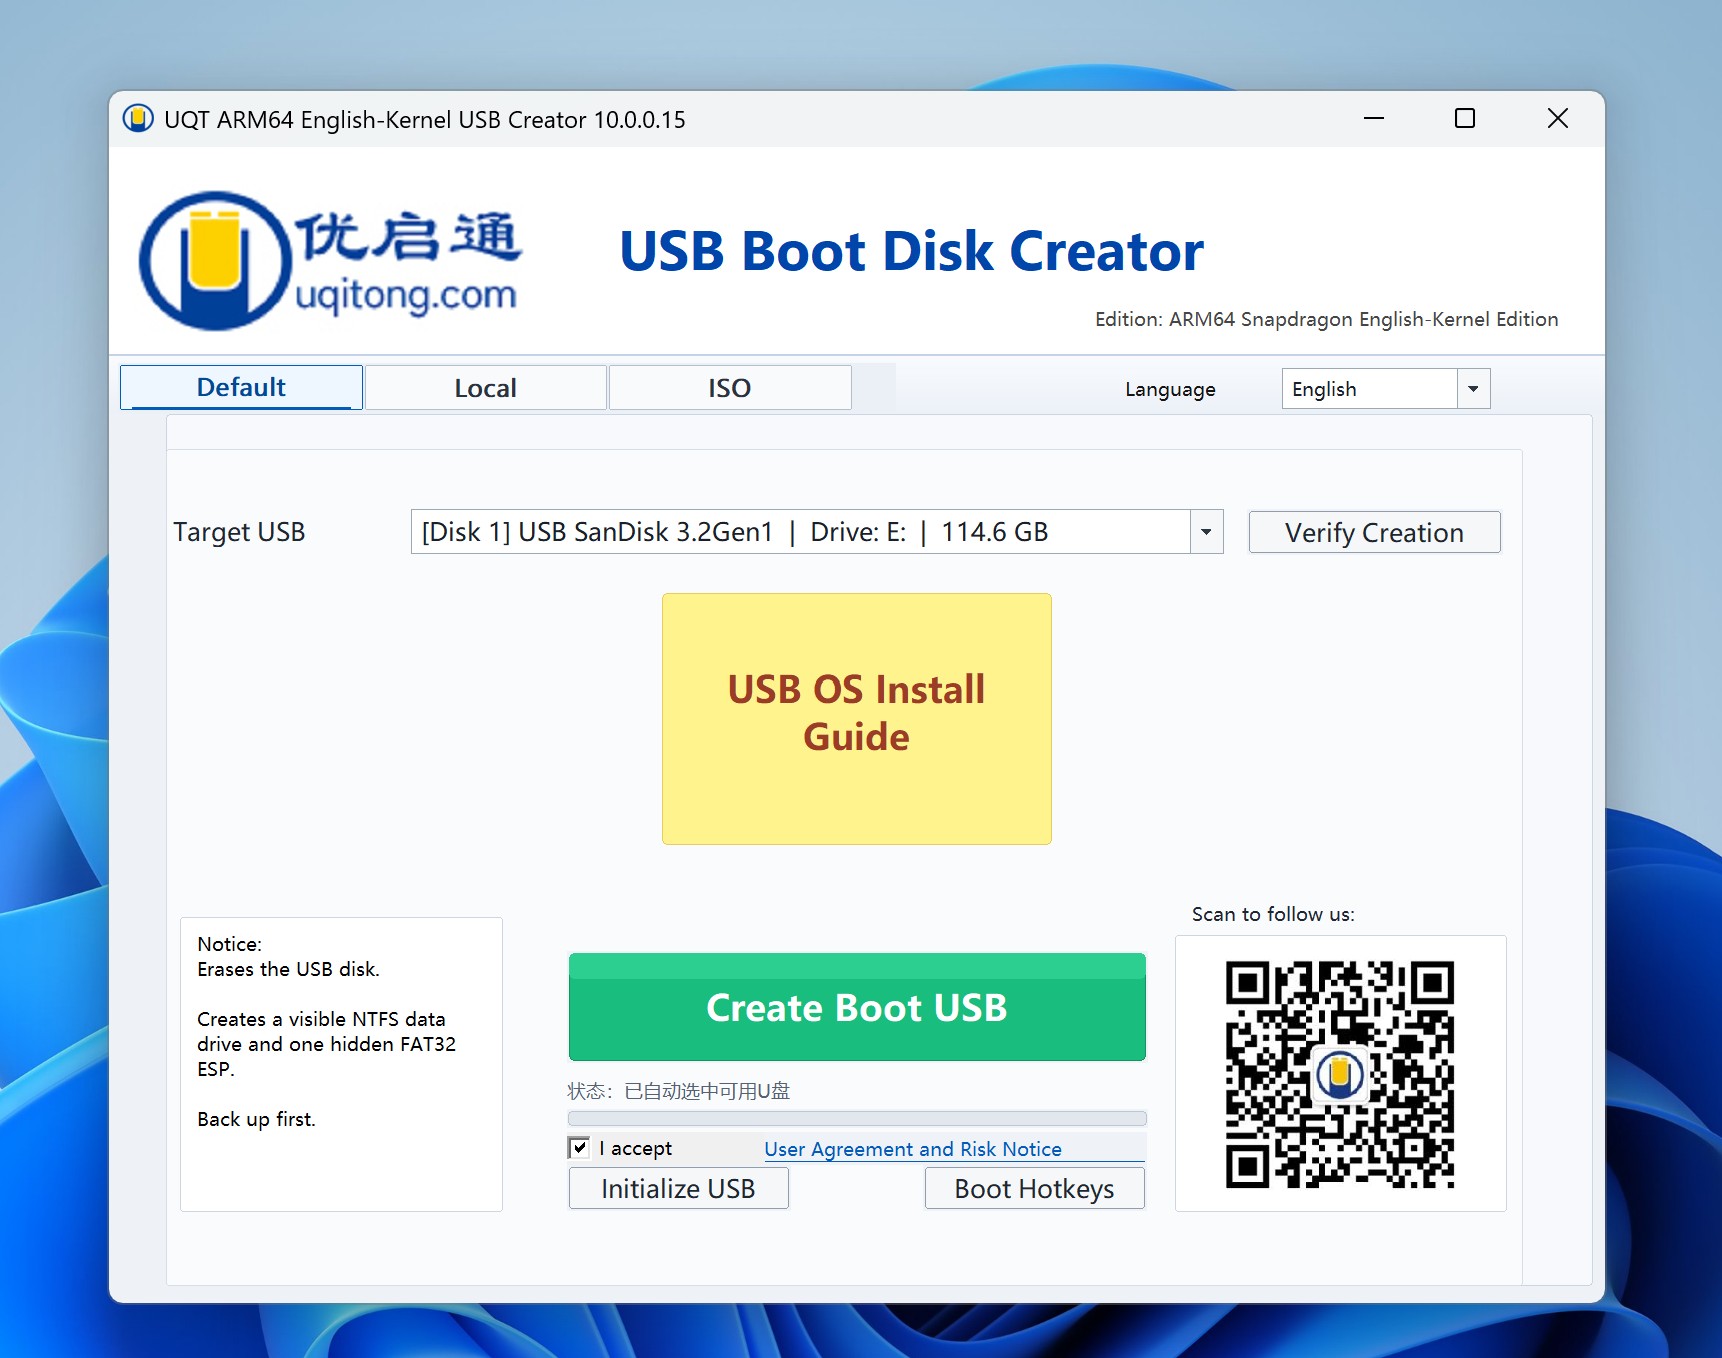
1Select the correct USB drive
Connect the USB flash drive and launch the downloaded creator. Approve the Windows administrator prompt if one appears.
On the Default tab, open the Target USB menu and carefully confirm all four identifiers:
- Disk number
- Manufacturer or device name
- Drive letter
- Capacity
The example below uses a 114.6 GB SanDisk drive. Your disk number, letter, and capacity will be different. If other removable drives are connected, unplug them first to reduce the chance of selecting the wrong device.
Select I accept, then click Create Boot USB. The selected USB drive will be erased.
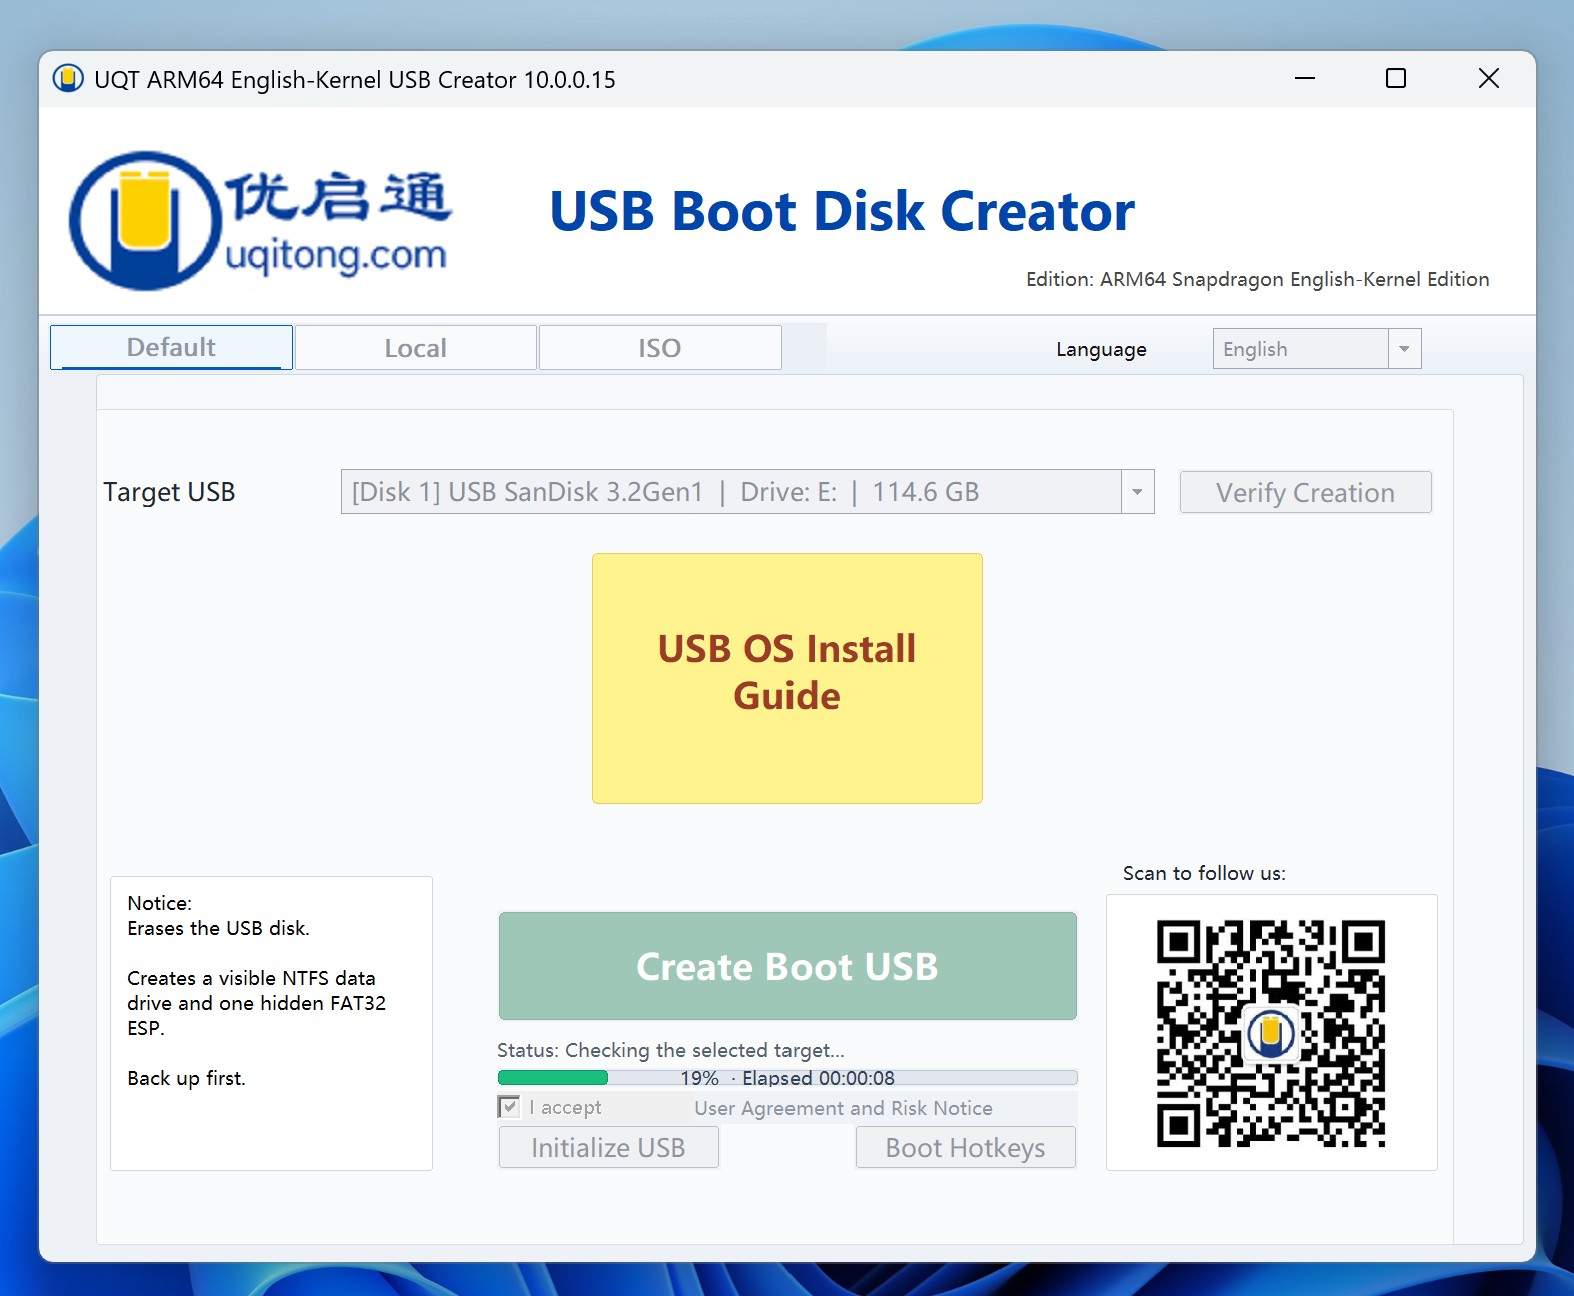
2Wait for the creator to finish
The creator first checks the selected device and then writes the boot environment. Do not close the application, remove the drive, or shut down the computer while this process is running.
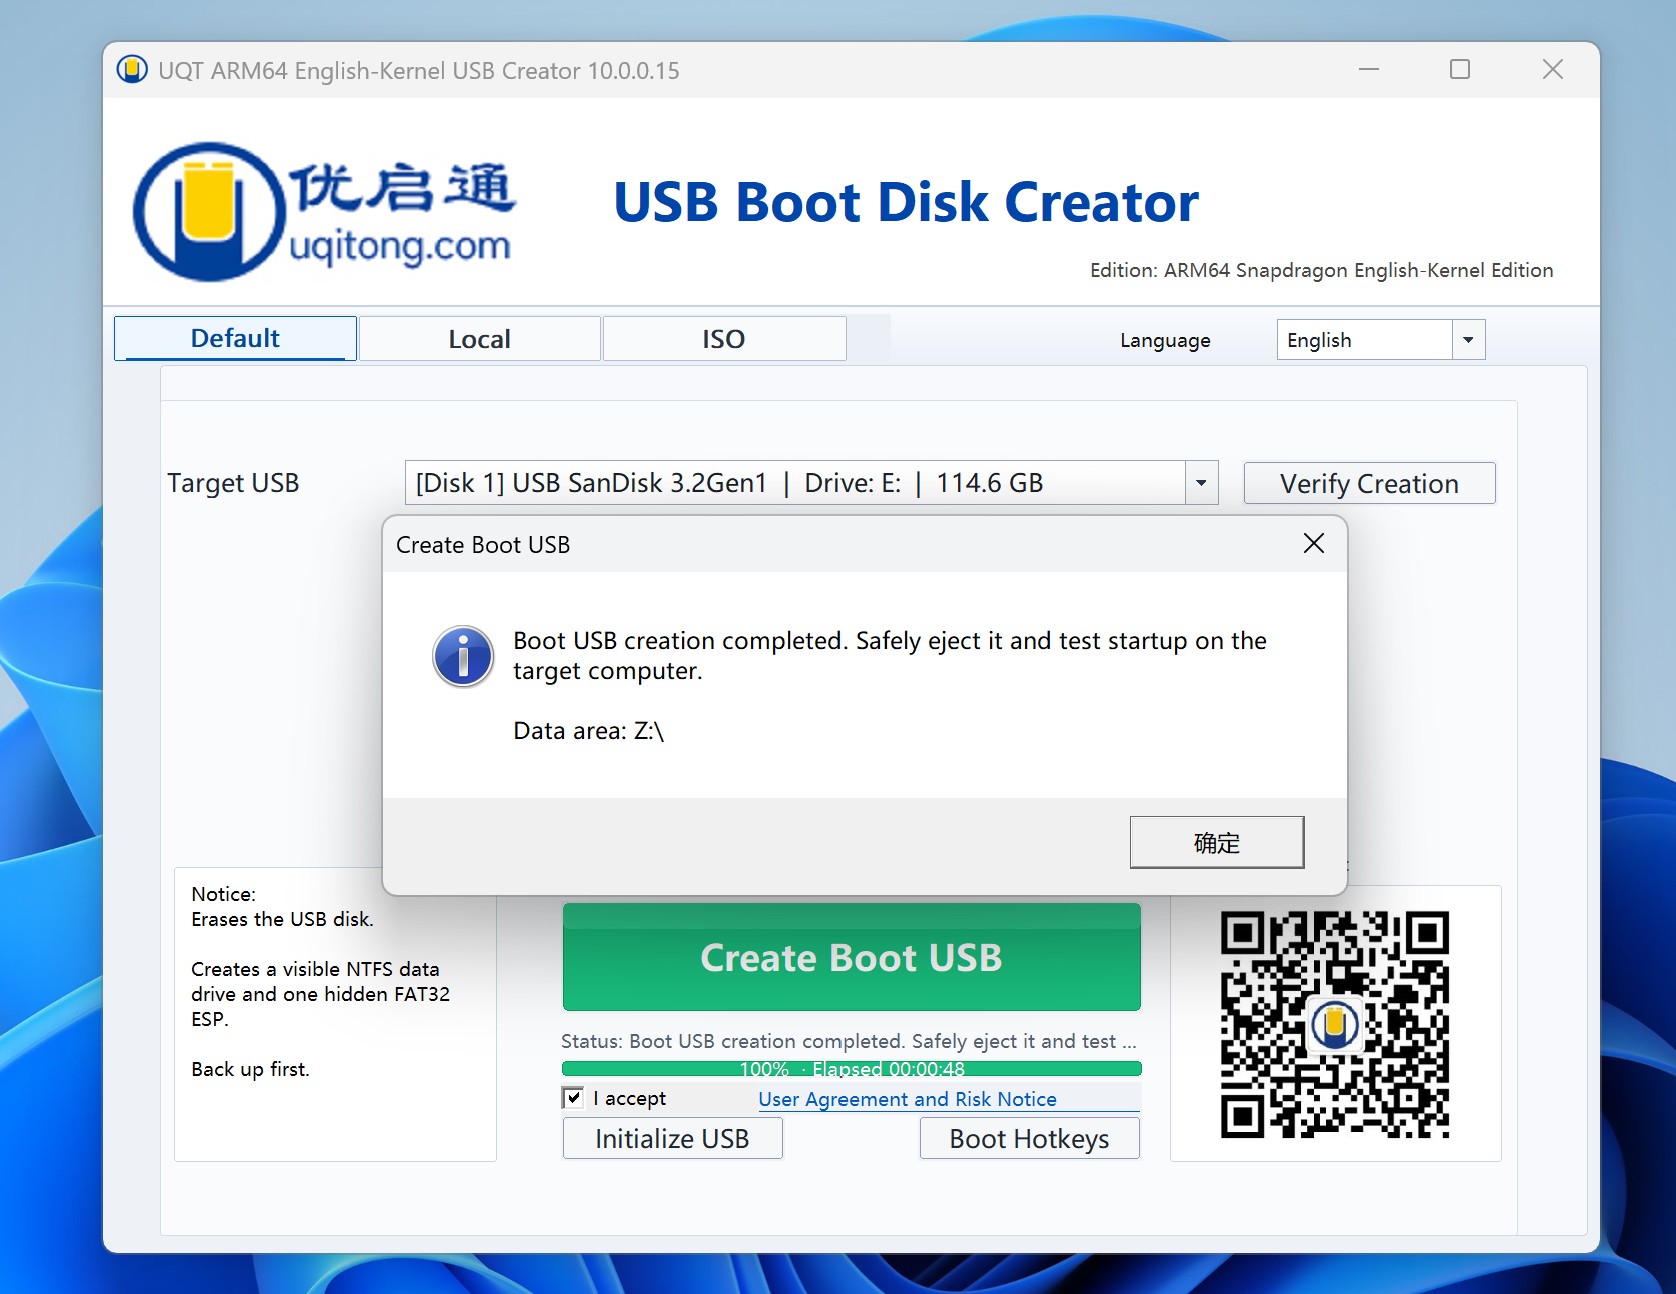
3Confirm and verify the result
When the success message appears, click OK. In the screenshot, the final button is labeled 确定, which means “OK”; its language may follow the Windows display environment used during the test.
If Verify Creation is available, run it before ejecting the drive. The creator makes a visible NTFS data area and a hidden FAT32 EFI System Partition. That hidden partition is expected—do not delete or reformat it.
4Make the Windows image available in PE
Before restarting the target PC, make sure the Windows 11 ARM64 image will be accessible from the uqitong PE environment. You can copy the ISO, WIM, ESD, or SWM file to the visible data area on the newly created USB drive, or place it on another drive that PE can read.
The drive letter can change after you boot into PE. Identify the image by its file name and location, not by assuming the drive will keep the same letter.
3. Start the PC from the USB Drive
Safely eject the USB drive, connect it to the Snapdragon PC you want to reinstall, and leave the PC connected to AC power.
1Open the one-time boot menu
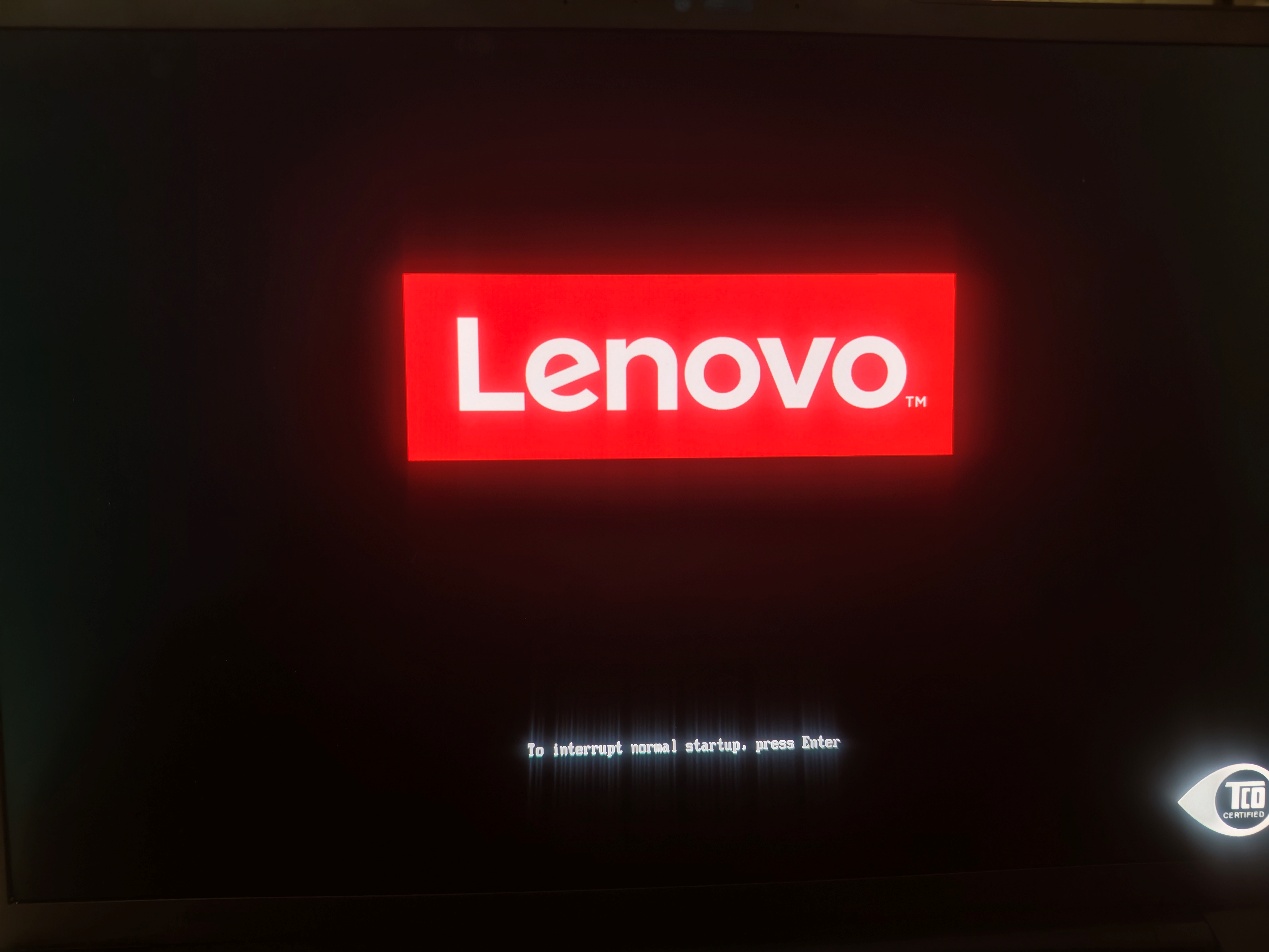
Restart the computer. As soon as the manufacturer logo appears, repeatedly press the key that opens the one-time boot menu. On many Lenovo and ThinkPad models, press F12; some models first ask you to press Enter to interrupt normal startup and then F12. Other manufacturers may use Fn+F12, Esc, or a different key. If Windows starts instead, restart and try again, or consult the computer manufacturer’s support instructions.
2Select the USB drive
In the boot menu, use the arrow keys to select the entry that matches your USB flash drive. Its name may include USB, USB HDD, or the drive manufacturer. In the example below, the correct entry is USB HDD: SanDisk Extreme Pro; your drive name will probably be different. Press Enter to start from it. Do not choose Windows Boot Manager or the computer’s internal NVMe/SSD.
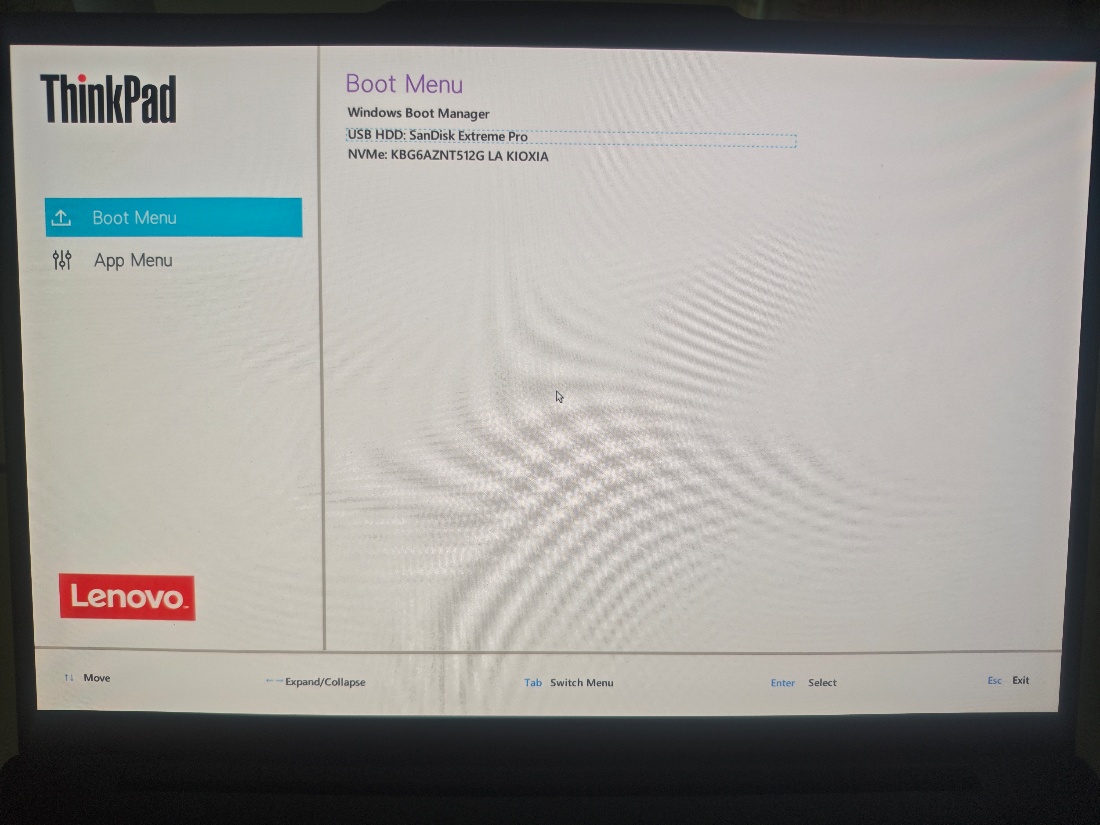
Leave Secure Boot enabled if the USB environment starts normally. If the PC cannot start from the USB drive, check the manufacturer’s UEFI instructions before changing security settings. If you temporarily disable Secure Boot to troubleshoot startup, enable it again after Windows is installed and booting correctly.
3Confirm that uqitong ARM PE starts
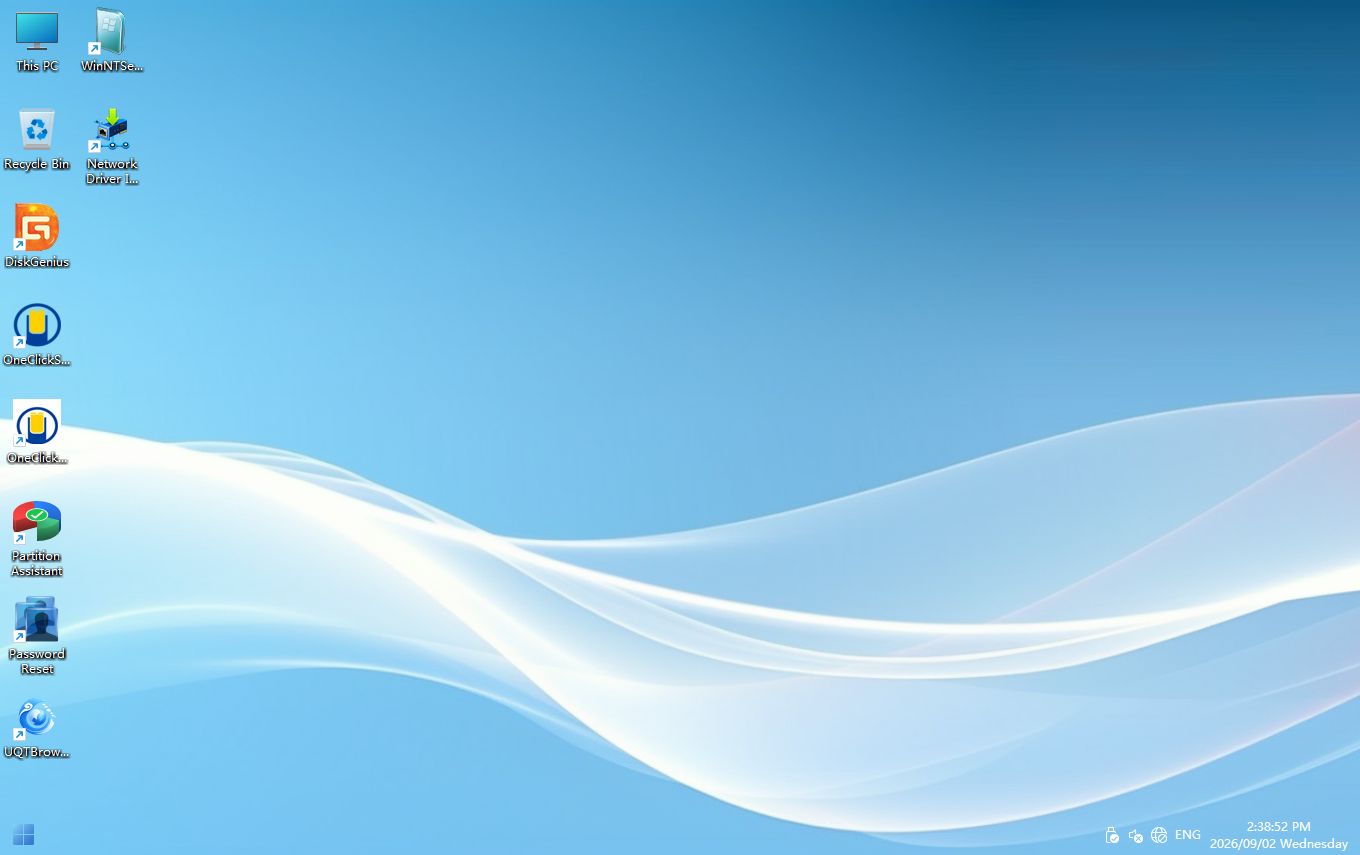
When startup succeeds, the uqitong ARM PE desktop appears. Open OneKey Reinstall System from the desktop.
4. Install Windows 11 ARM64
The OneKey Reinstall System window organizes the installation into three main selections.
1Choose the system image
Click Browse and select your Windows 11 ARM64 ISO, WIM, ESD, or SWM file. Confirm that the file is the ARM64 release—not an x64 image with a similar name.
2Choose the target partition
Select the partition where Windows should be installed. Drive letters can be different in PE, so do not identify the partition by the letter alone. Cross-check its disk number, partition number, label, total capacity, free space, and existing folders.
Choosing the wrong partition can destroy data. If anything is unclear, stop and inspect the disks before clicking Start install.
3Choose the edition and installation options
Select the Windows edition contained in the image, such as Windows 11 Home or Windows 11 Pro. Use the same edition covered by the PC’s digital license whenever possible.
Review each option before continuing:
- Format target performs a clean install and deletes everything on the selected partition.
- Repair boot rebuilds the Windows boot files and is normally appropriate for a clean reinstall.
- Unattended automates supported setup steps.
- Reboot restarts the computer when image deployment is complete.
- Import X:\Drivers drivers imports the drivers supplied in the PE environment.
- The network-driver section can preserve or import the driver for the bound physical Ethernet or Wi-Fi adapter, which may help the new Windows installation get online sooner.
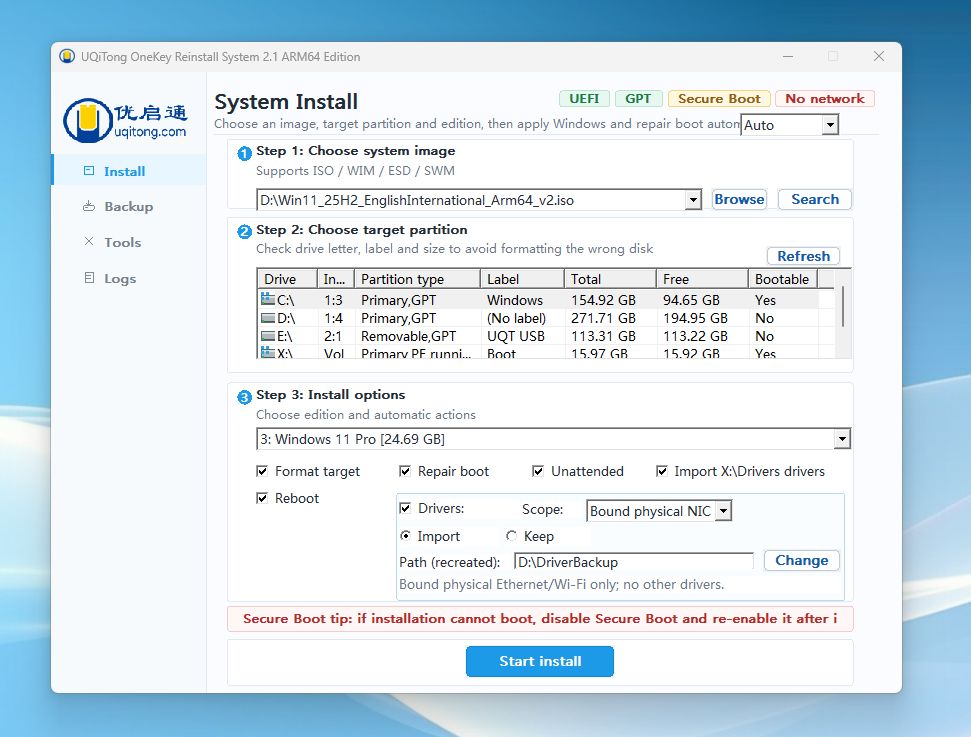
Click Start install only after the image and target partition are correct. If a final formatting warning appears, read the target details again before confirming.
The tool will apply the Windows image and repair the boot environment. Do not close the program, remove the USB drive, or disconnect power while the progress screen is active.
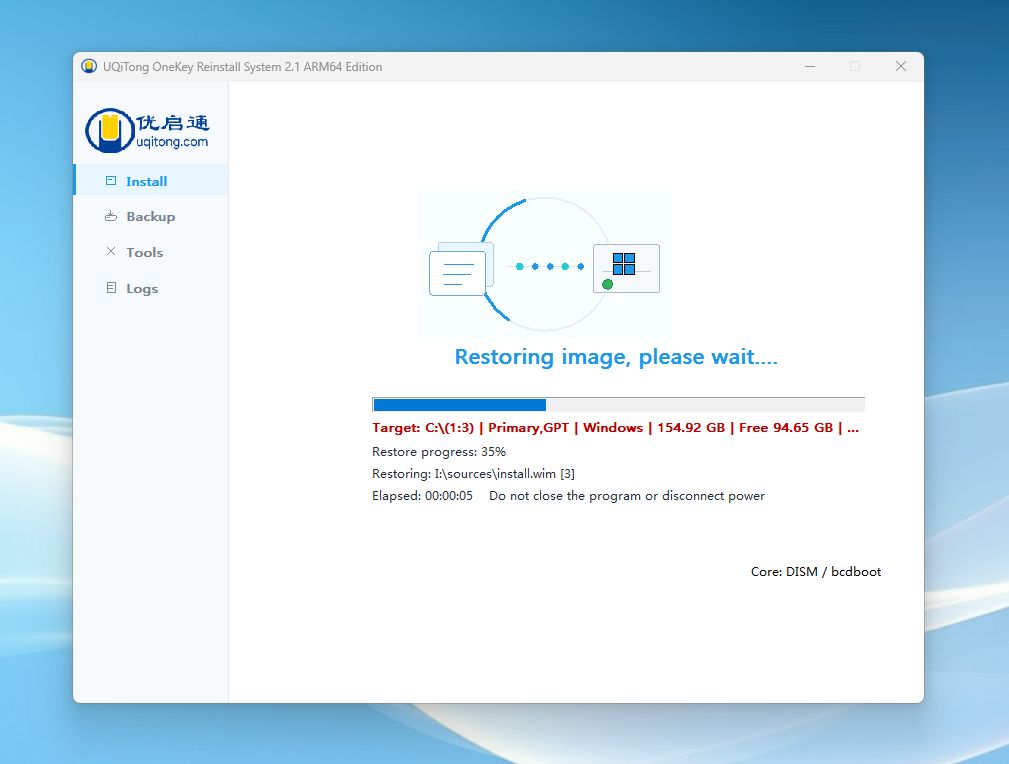
When the process finishes and the computer restarts, remove the USB drive when it is safe to do so, or select the internal Windows Boot Manager from the boot menu. If the PC returns to uqitong PE, it is usually booting from the USB drive again; shut down, remove the USB drive, and start the PC from its internal storage.
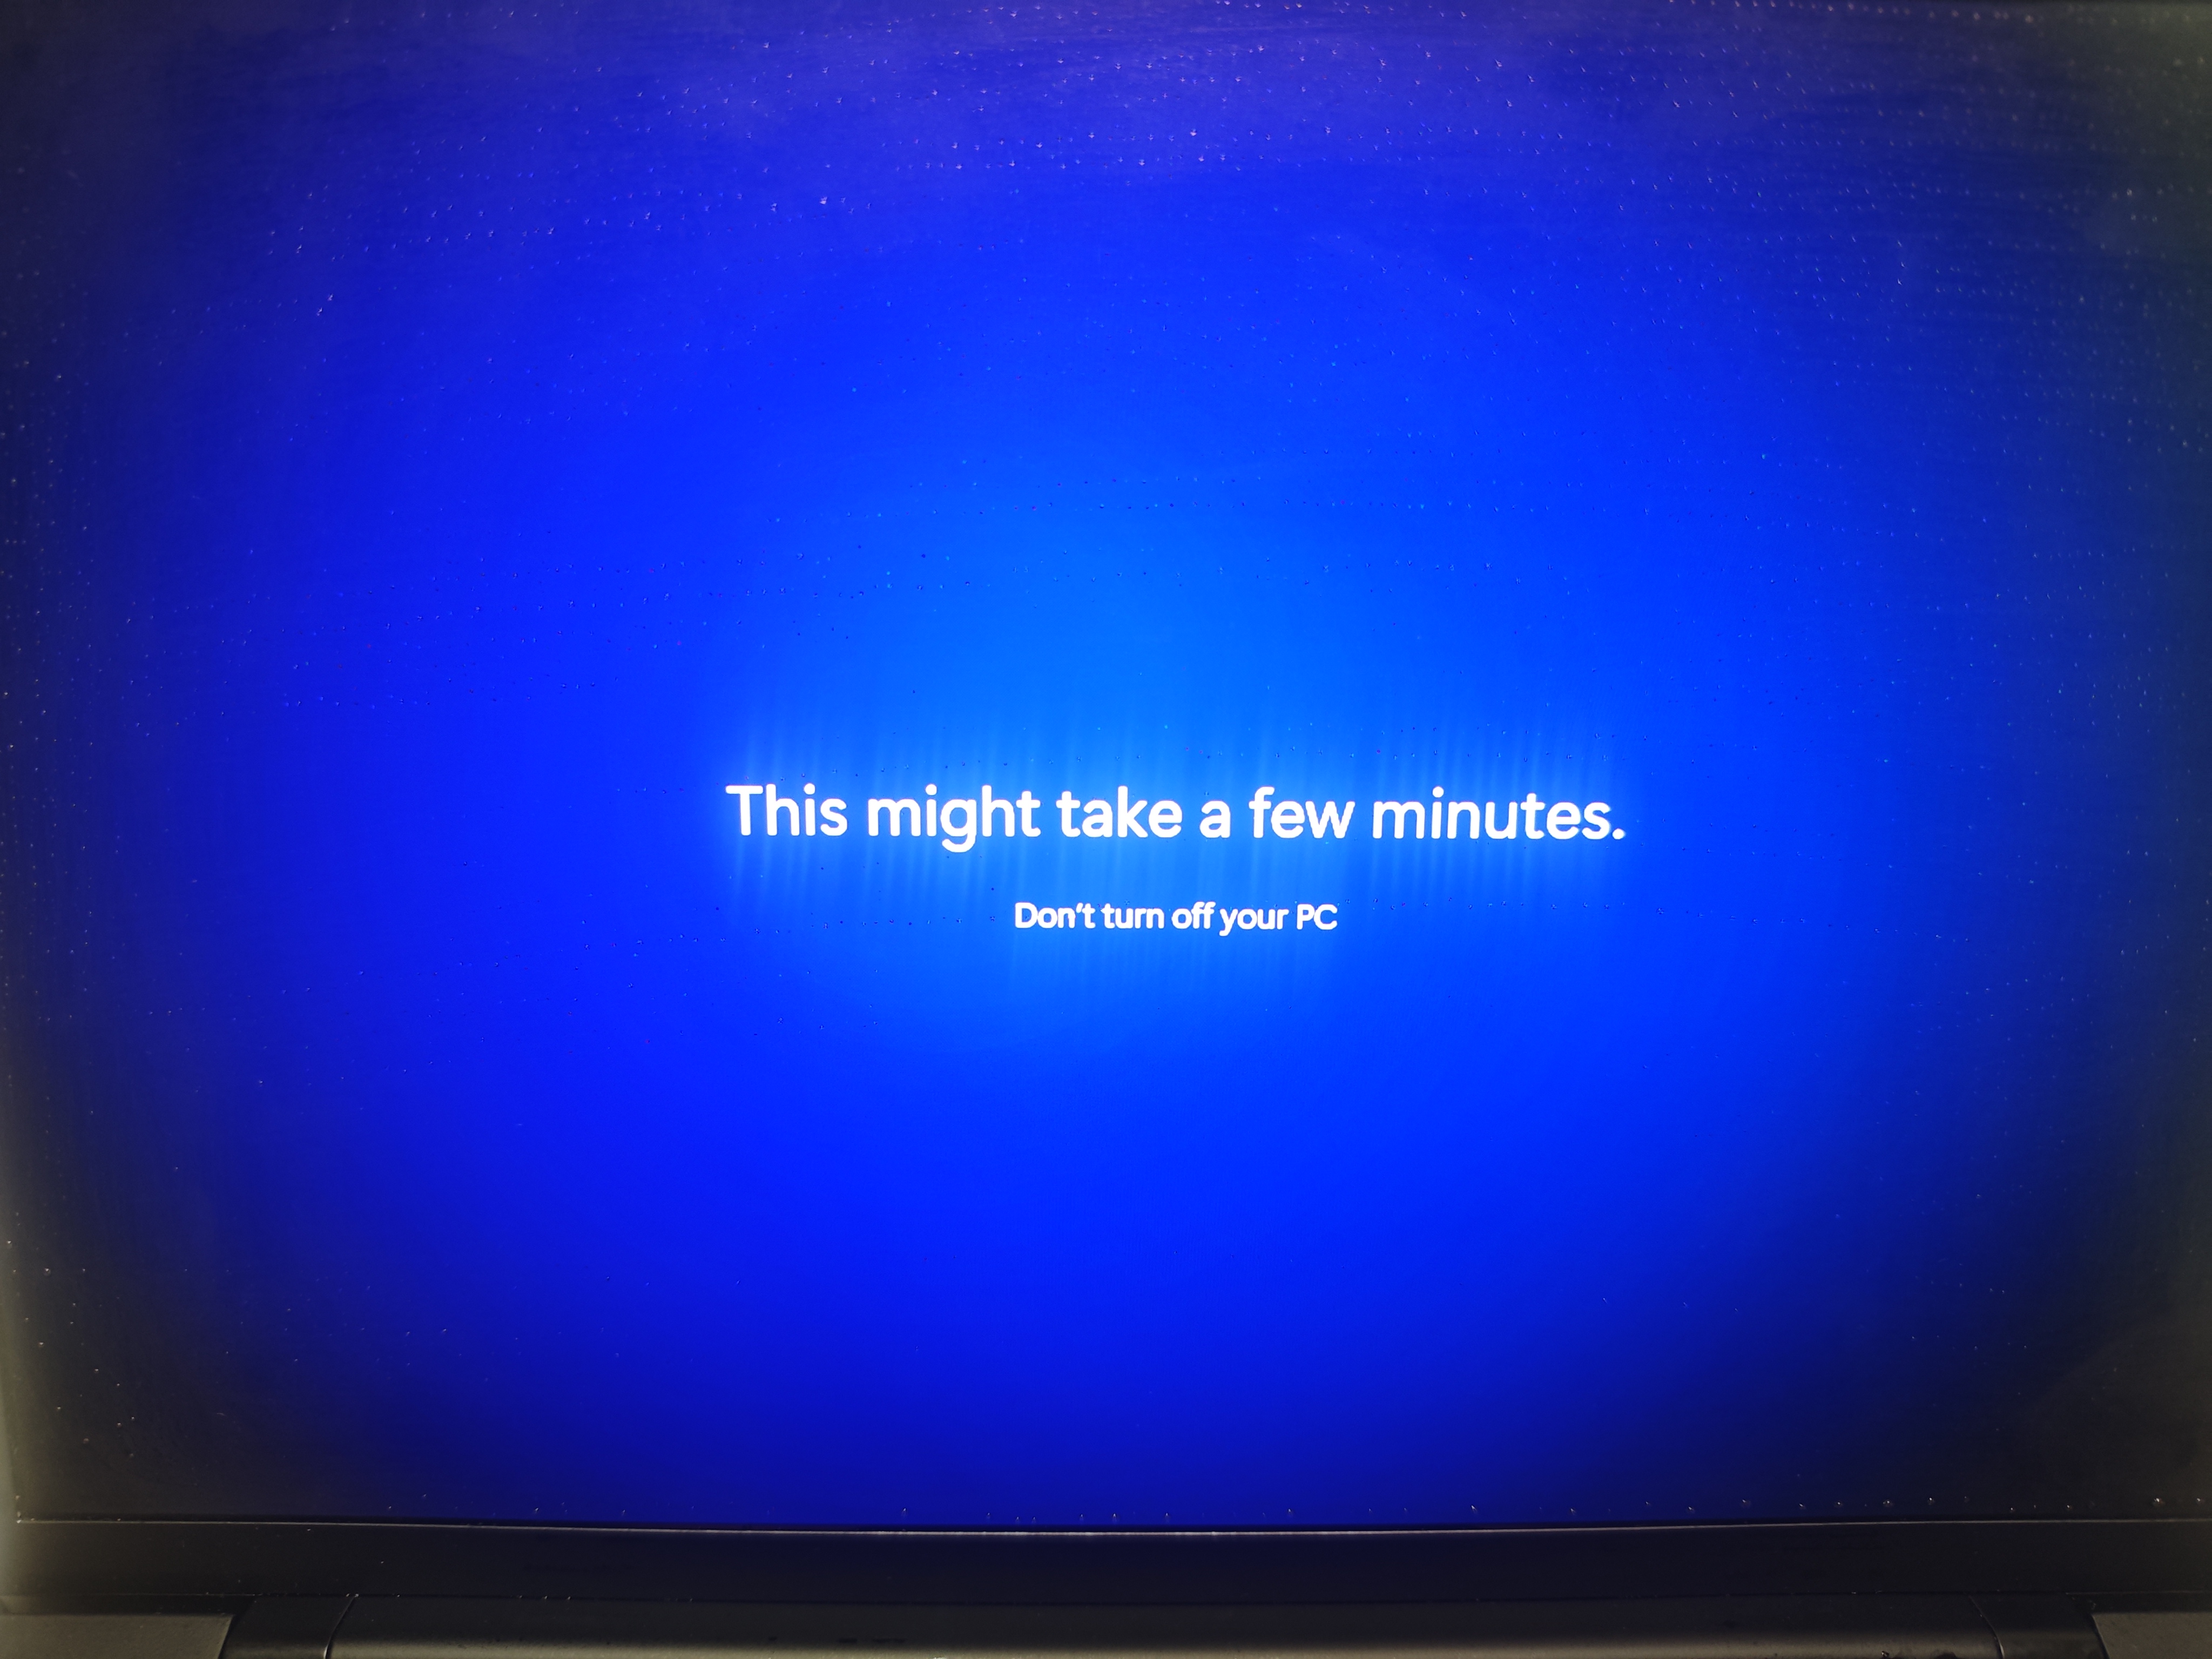
Windows will now configure the newly deployed system. A full-screen message may say This might take a few minutes. Don’t turn off your PC. Keep the computer connected to power and let it continue, even if the screen changes or the PC restarts automatically.
5. Complete the First Windows Startup
Windows may restart several times while it detects hardware and completes setup. Do not interrupt it. If the Windows out-of-box experience appears, complete the region, keyboard, network, account, privacy, and device-name screens that apply to you.
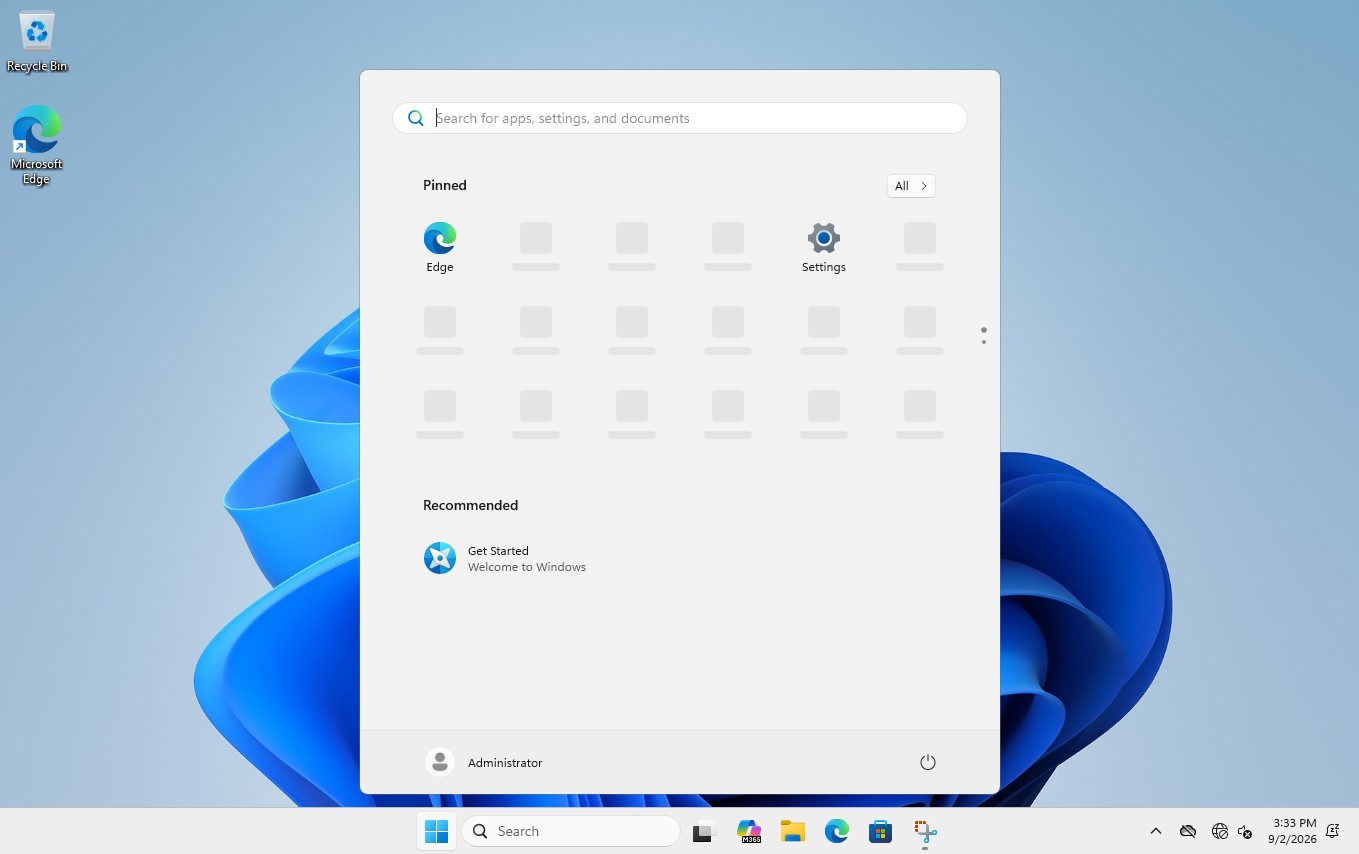
Reaching the Windows 11 desktop confirms that the operating system can start from the internal drive.
6. Connect to the Internet
Select the network icon on the taskbar, turn on Wi-Fi if needed, choose your network, and click Connect. Enter the wireless password when prompted.
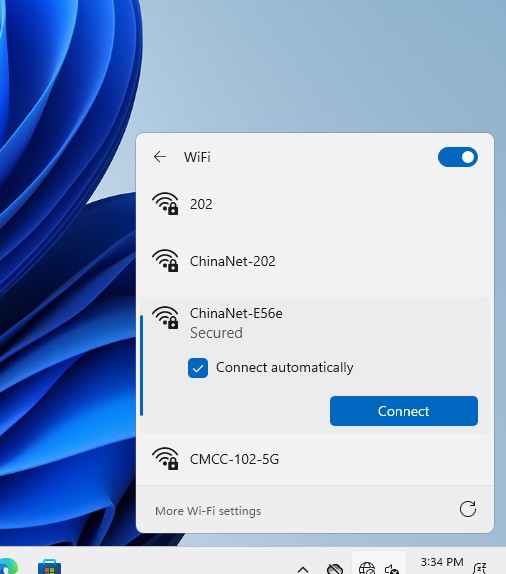
Open Settings and confirm that the network status shows Connected, secured. A visible Wi-Fi button alone does not prove that internet access works, so open a trusted website to test the connection.
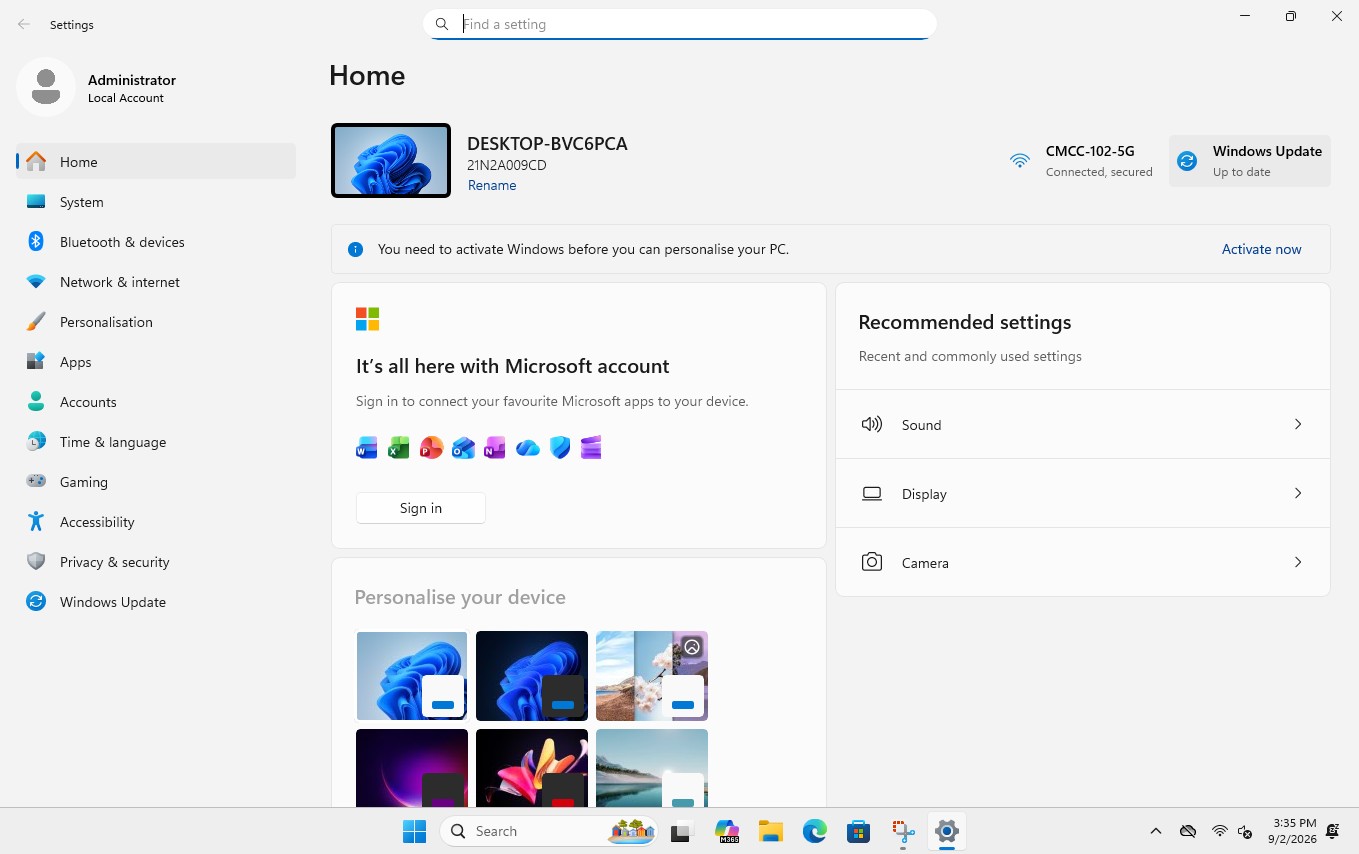
Activation note: Windows activation is separate from installation. A PC with a valid digital license will usually reactivate after it connects to the internet, provided that the installed Windows edition matches the license. You can check the result under Settings > System > Activation.
7. Install Windows and Device Updates
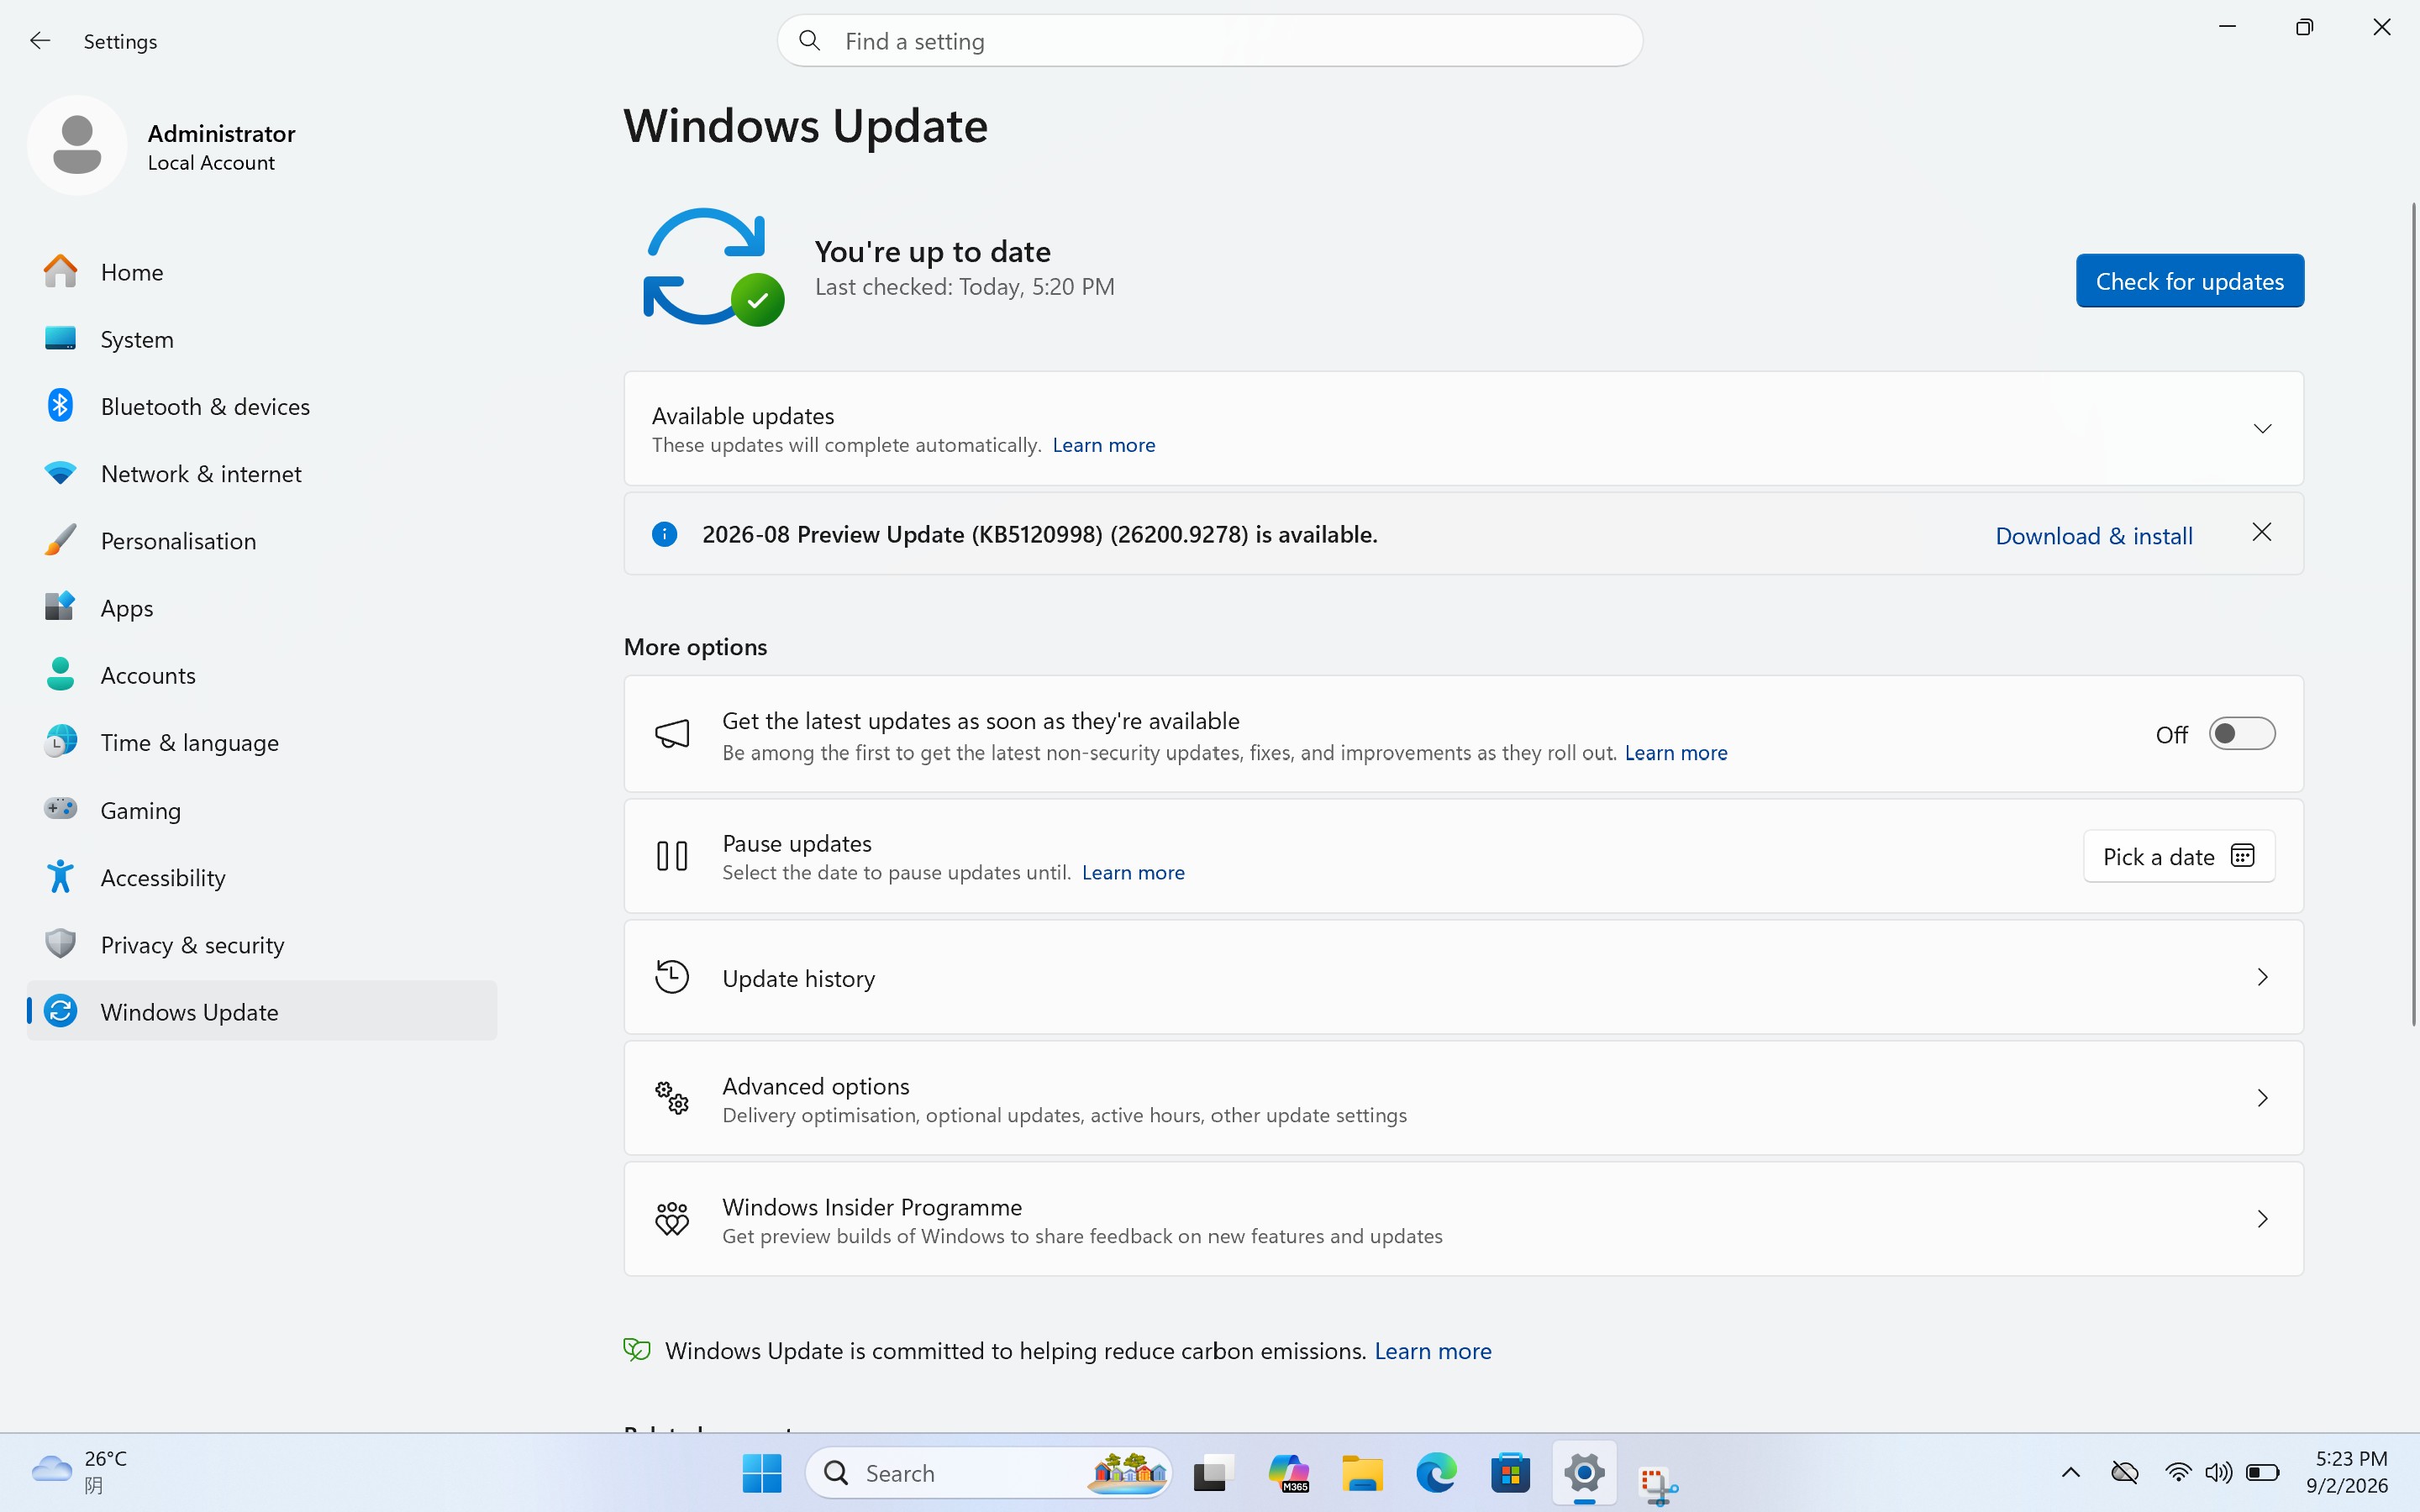
Open Settings > Windows Update, then click Check for updates.
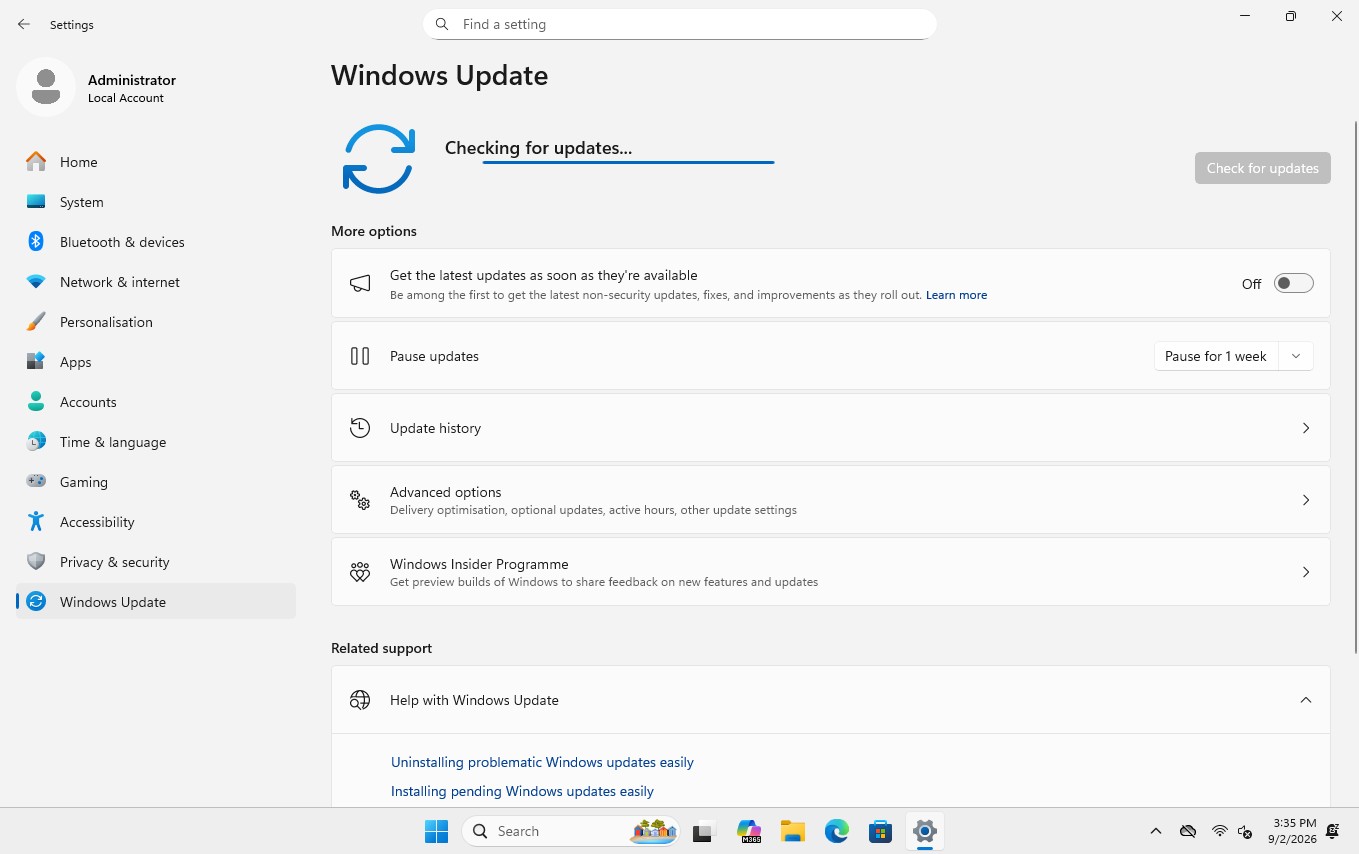
Allow Windows to download and install the available security updates, cumulative updates, firmware, and device drivers. The list may include PC-maker firmware and drivers for audio, Wi-Fi, the touchpad, or other hardware.
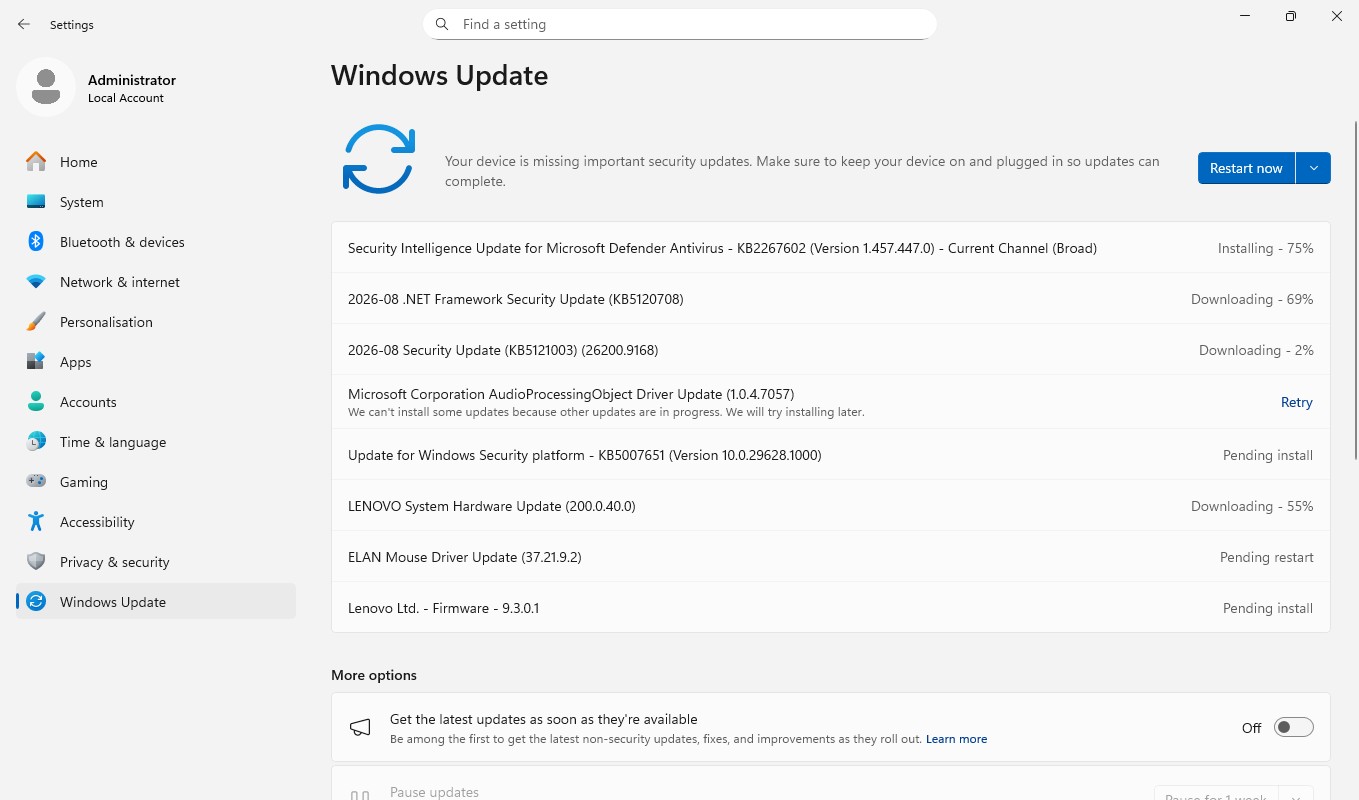
If Windows displays Restart now, save your work and restart the PC. Some updates remain marked Pending restart until that reboot occurs.
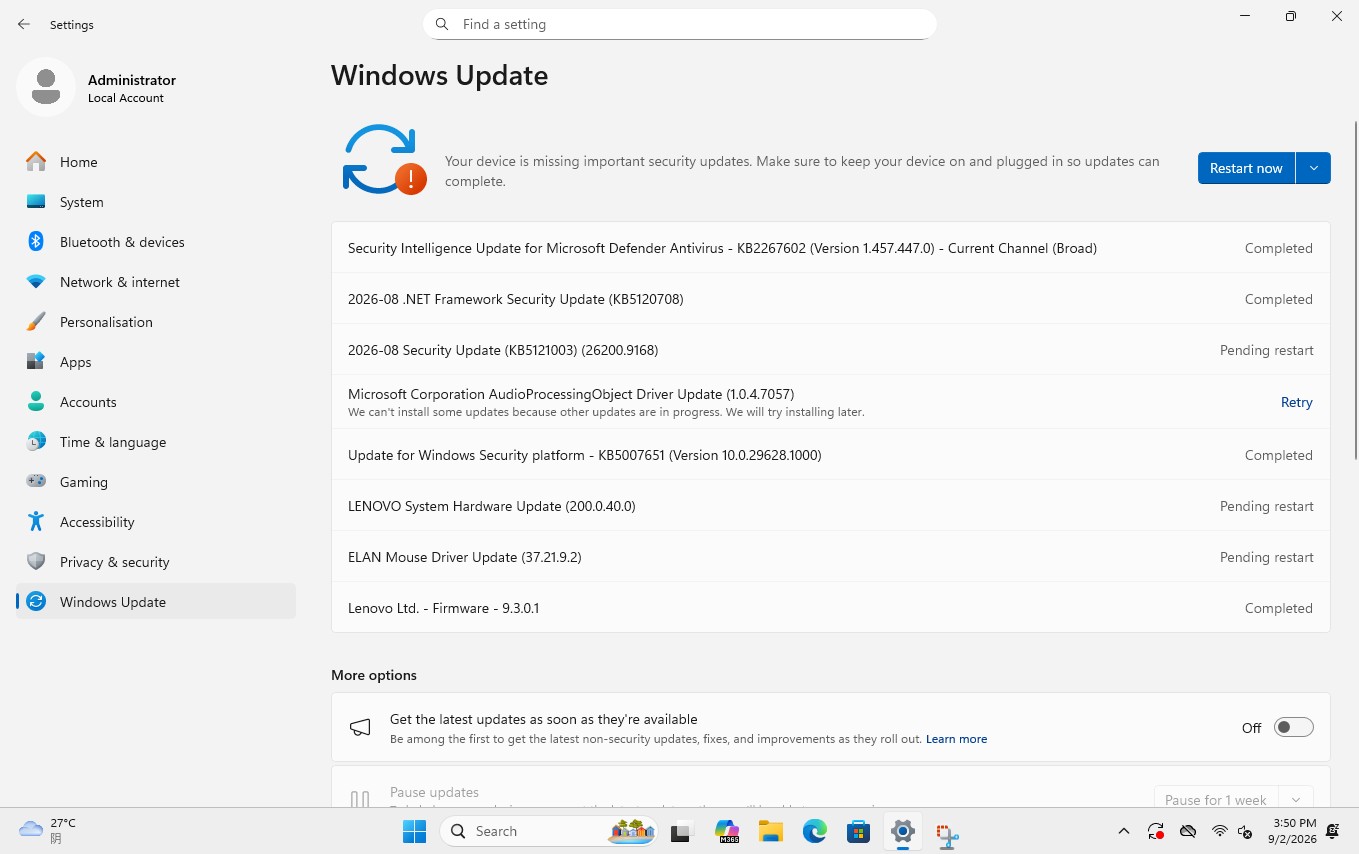
After each restart, return to Settings > Windows Update and check again. Repeat the cycle until Windows reports You’re up to date.
An optional Preview Update may still appear under that message. Installing an optional preview release is not required to finish a normal reinstall; unless you specifically need one of its fixes, you can wait for the next regular cumulative update.
Final Checklist
The reinstall is complete when all of the following are true:
- The PC starts from its internal drive with the USB flash drive disconnected.
- Windows reaches the desktop without returning to the PE environment.
- Wi-Fi or Ethernet connects and a real website opens successfully.
- Windows Update finishes all required updates and no required restart remains.
- Windows activation shows the expected status for your license.
- Your essential hardware works normally after the updates are installed.
Keep the bootable USB drive if you want a recovery tool for future repairs. If you later repurpose it as an ordinary flash drive, use the creator’s Initialize USB function or another trusted disk-management method only after confirming that you no longer need its boot environment or the Windows image stored on it.
Troubleshooting
The USB drive does not appear in the boot menu
Reconnect it, try another USB port, and run Verify Creation on the working Windows computer. Confirm that you selected the UEFI USB entry and consult the PC manufacturer’s boot-menu instructions. Avoid changing unrelated firmware settings.
The Windows image is missing or cannot be opened
Make sure the file is stored on a drive visible in PE and that it is a valid Windows 11 ARM64 ISO, WIM, ESD, or SWM image. If the image was downloaded, verify it again from its trusted source rather than using a possibly incomplete file.
The PC keeps returning to uqitong PE
Remove the USB drive after image deployment, then start the computer from the internal Windows Boot Manager.
Windows starts, but Wi-Fi does not work
Finish Windows Update using Ethernet if available. Otherwise, download the correct ARM64 network driver for the exact PC model from the manufacturer’s support site on another computer and transfer it by USB. Do not install an x64 driver or a generic driver from an unknown source.
Windows will not start after deployment
Confirm that the image is ARM64, the correct internal target partition was selected, and the boot files were repaired. Check the PC manufacturer’s UEFI and Secure Boot guidance. If you temporarily disabled Secure Boot for troubleshooting, re-enable it after Windows starts successfully.
Ready to begin?
For current downloads and product information, visit the official uqitong ARM website.