This is the English tutorial with English creator screenshots. 查看中文版教程 →
How to Create a Bootable USB Drive with uqitong ARM
This walkthrough covers the complete path from downloading the creator and verifying the target USB drive to opening the boot menu on a Snapdragon PC and reaching the uqitong ARM PE desktop.
Video walkthrough
Watch the complete video first, then use the illustrated steps below to verify the target USB drive and each action.
Read this before you begin
- Creating the drive erases every file and partition on the selected USB flash drive. Copy anything important to another location first.
- Verify the disk number, device name, drive letter, and capacity together. Do not select an external hard drive or an unrelated data disk.
- Keep the Windows PC connected to reliable power. Do not unplug the USB drive, close the creator, or let the PC sleep while creation is in progress.
- The boot environment is for currently supported Qualcomm Snapdragon ARM64 Windows PCs. Use the appropriate x86/x64 edition of uqitong for a traditional Intel or AMD PC.
1. Before You Begin
- A Windows computer that can download and run the uqitong ARM creator.
- An erasable USB flash drive; 16 GB or larger is recommended.
- A currently supported Qualcomm Snapdragon ARM64 Windows PC for the startup test.
- The current ARM English Edition from the official uqitong ARM download section.
- If you later plan to reinstall Windows, obtain an image that matches the target PC and uses the ARM64 architecture. No ISO, GHO, or operating-system image is needed just to create and test the bootable drive.
To reduce the chance of selecting the wrong disk, disconnect USB drives and external disks that are not part of this task before opening the creator.
2. Download and Open the Creator
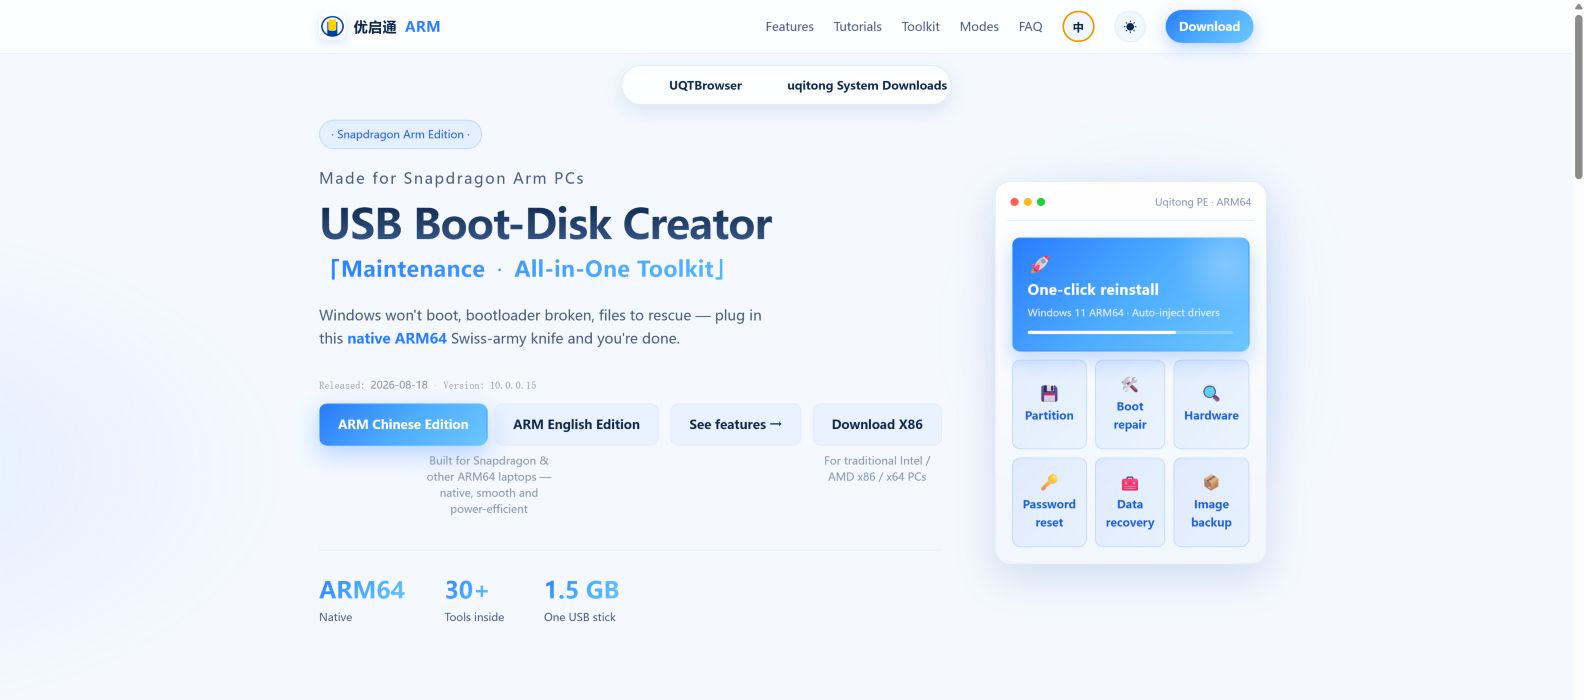
1Download the ARM English Edition
Open the official uqitong ARM website and choose ARM English Edition. Run the downloaded file, complete the installer if one appears, and then launch the creator. Allow the Windows administrator prompt because partitioning the USB drive and writing its boot files require elevated access.
2Use Default mode for a physical USB drive
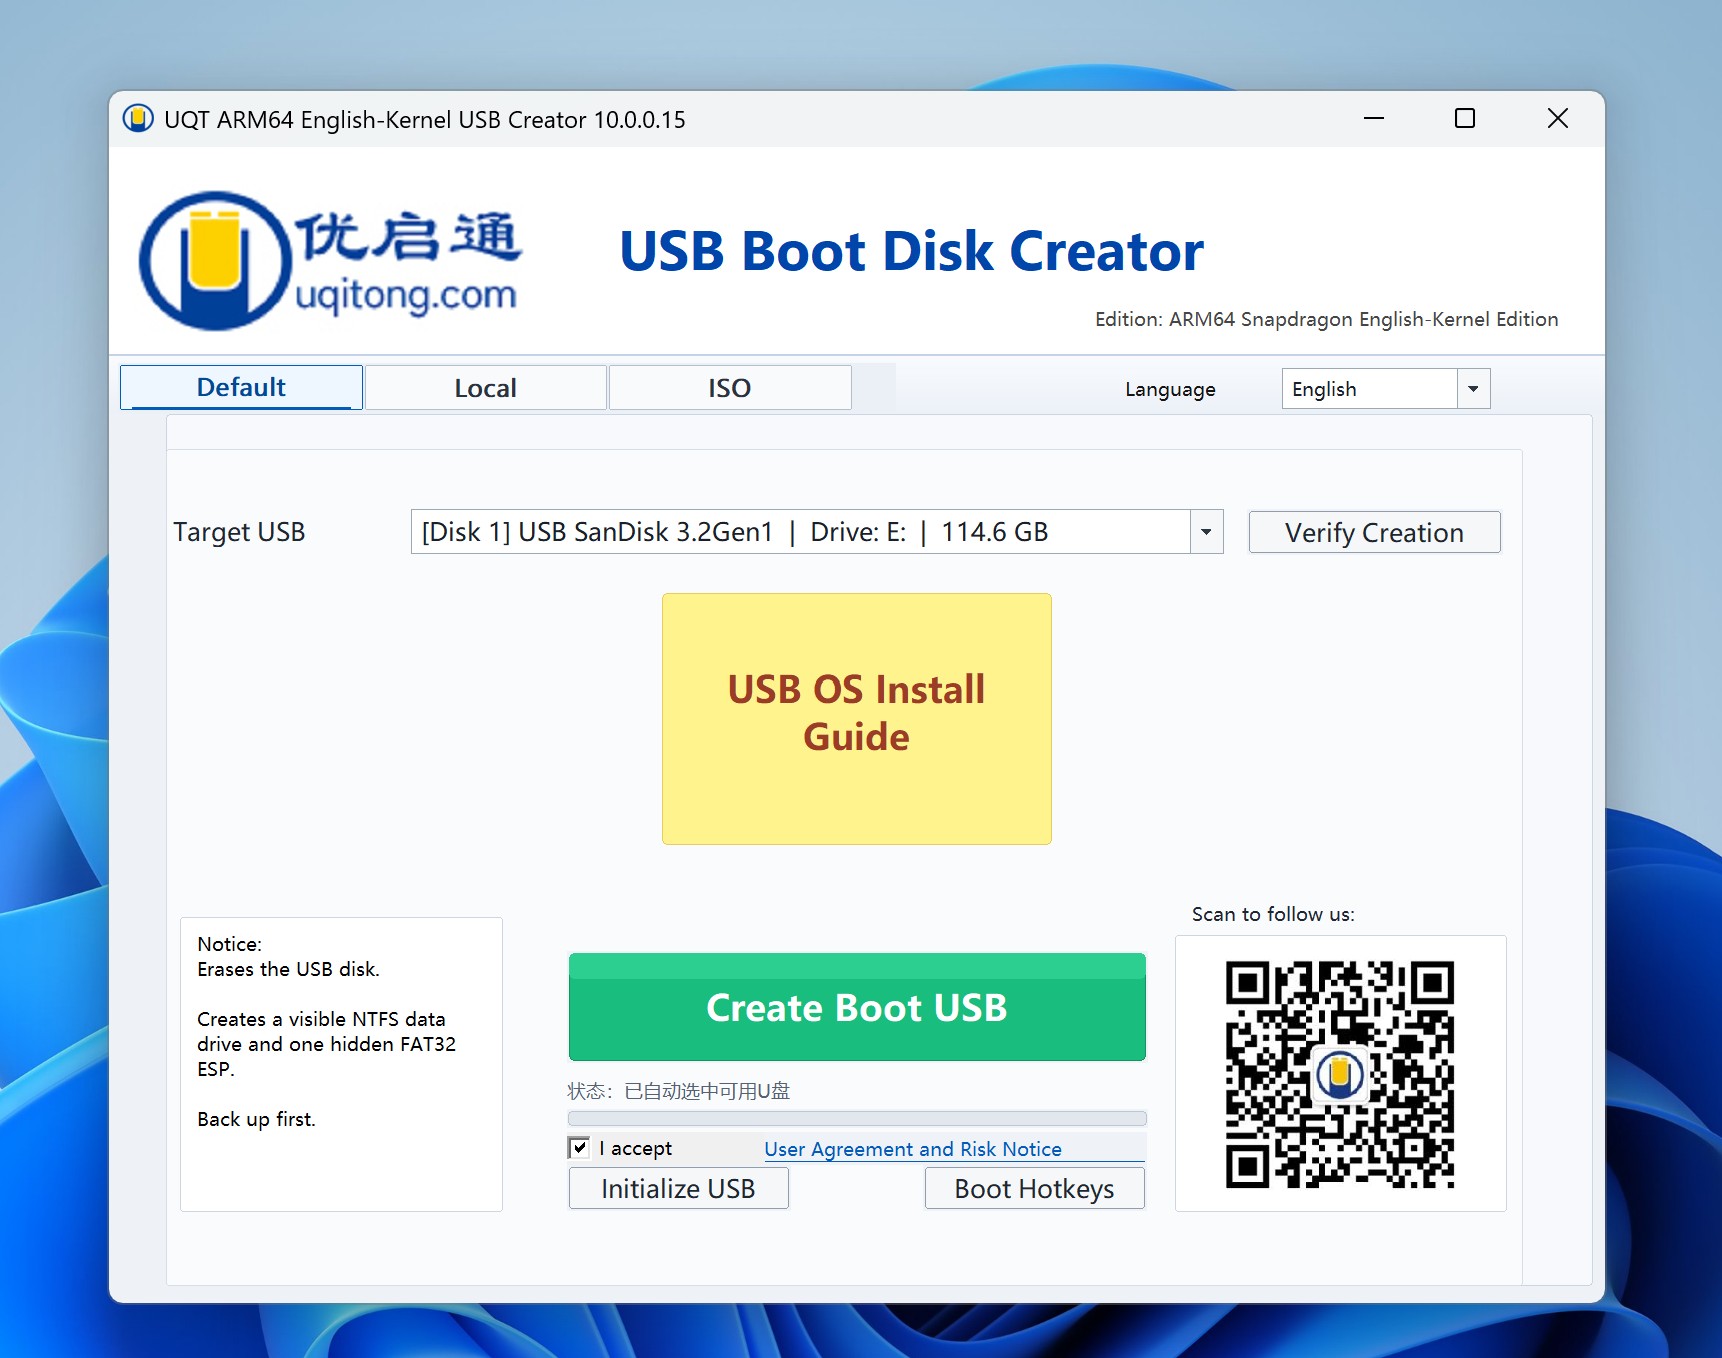
The creator offers three modes. For the procedure on this page, keep Default selected.
| Mode | Purpose |
|---|---|
| Default | Writes the built-in ARM PE environment to a physical USB drive. This guide uses this mode. |
| Local | Adds the maintenance environment to the current PC's local startup menu. It does not create a physical USB drive. |
| ISO | Creates an ISO file for a specific ISO-based workflow. It is not the same as writing the physical USB drive used here. |
3. Create the Bootable USB Drive
1Connect and verify the target USB drive
Connect the USB flash drive and wait for it to appear under Target USB. Check the disk number, manufacturer or device name, drive letter, and capacity. The screenshot shows a 114.6 GB SanDisk drive only as an example; your device name and capacity will be different.
After every identifier matches the drive you intend to erase, select I accept and click Create Boot USB. Continue through the erasure warning only after the target and backup are confirmed.
2Wait for creation to finish
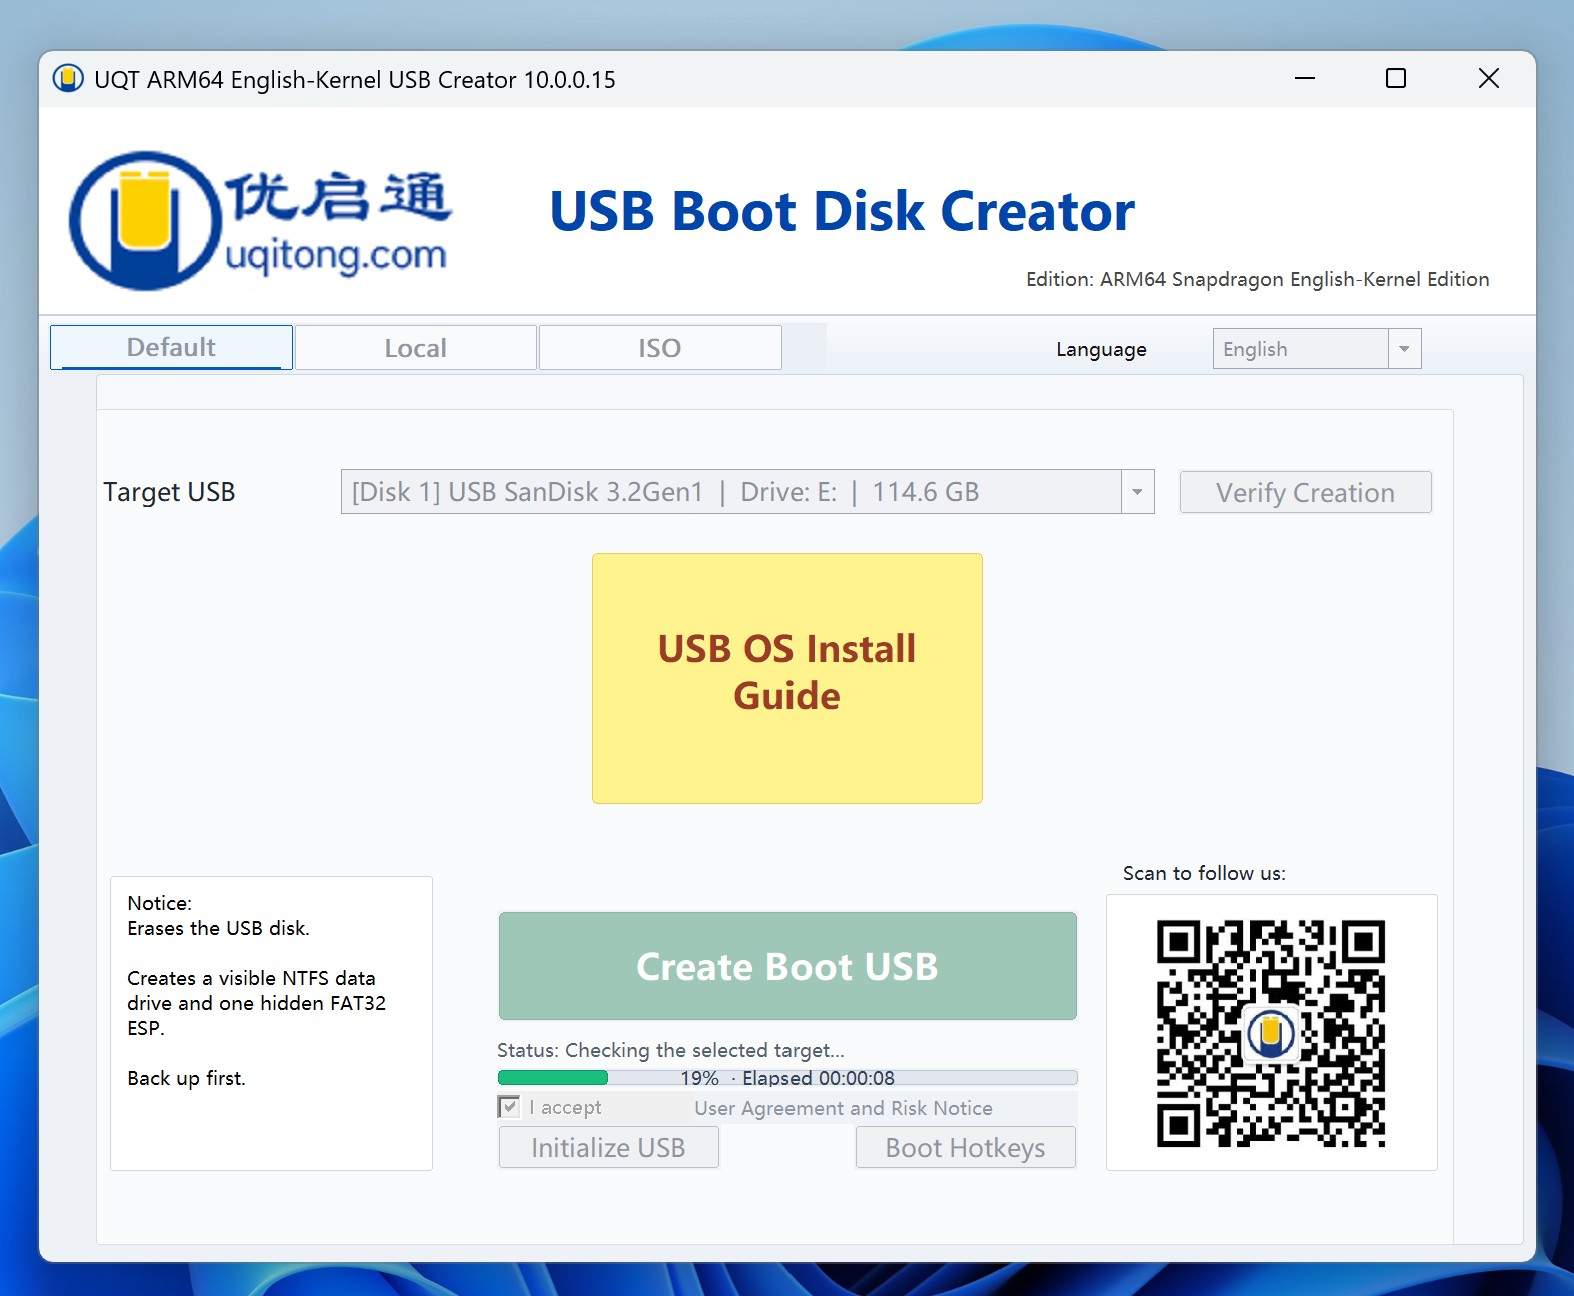
Keep the USB drive connected after the progress bar starts. Do not force the creator to close. The time required depends on the USB port, drive performance, and Windows PC, so the time shown in a screenshot is not a general estimate.
3Confirm the success message
When Boot USB creation completed appears, close the message. The creator makes one visible NTFS data area and one hidden FAT32 EFI System Partition. File Explorer normally shows only the data area; do not delete or reformat the hidden boot partition.
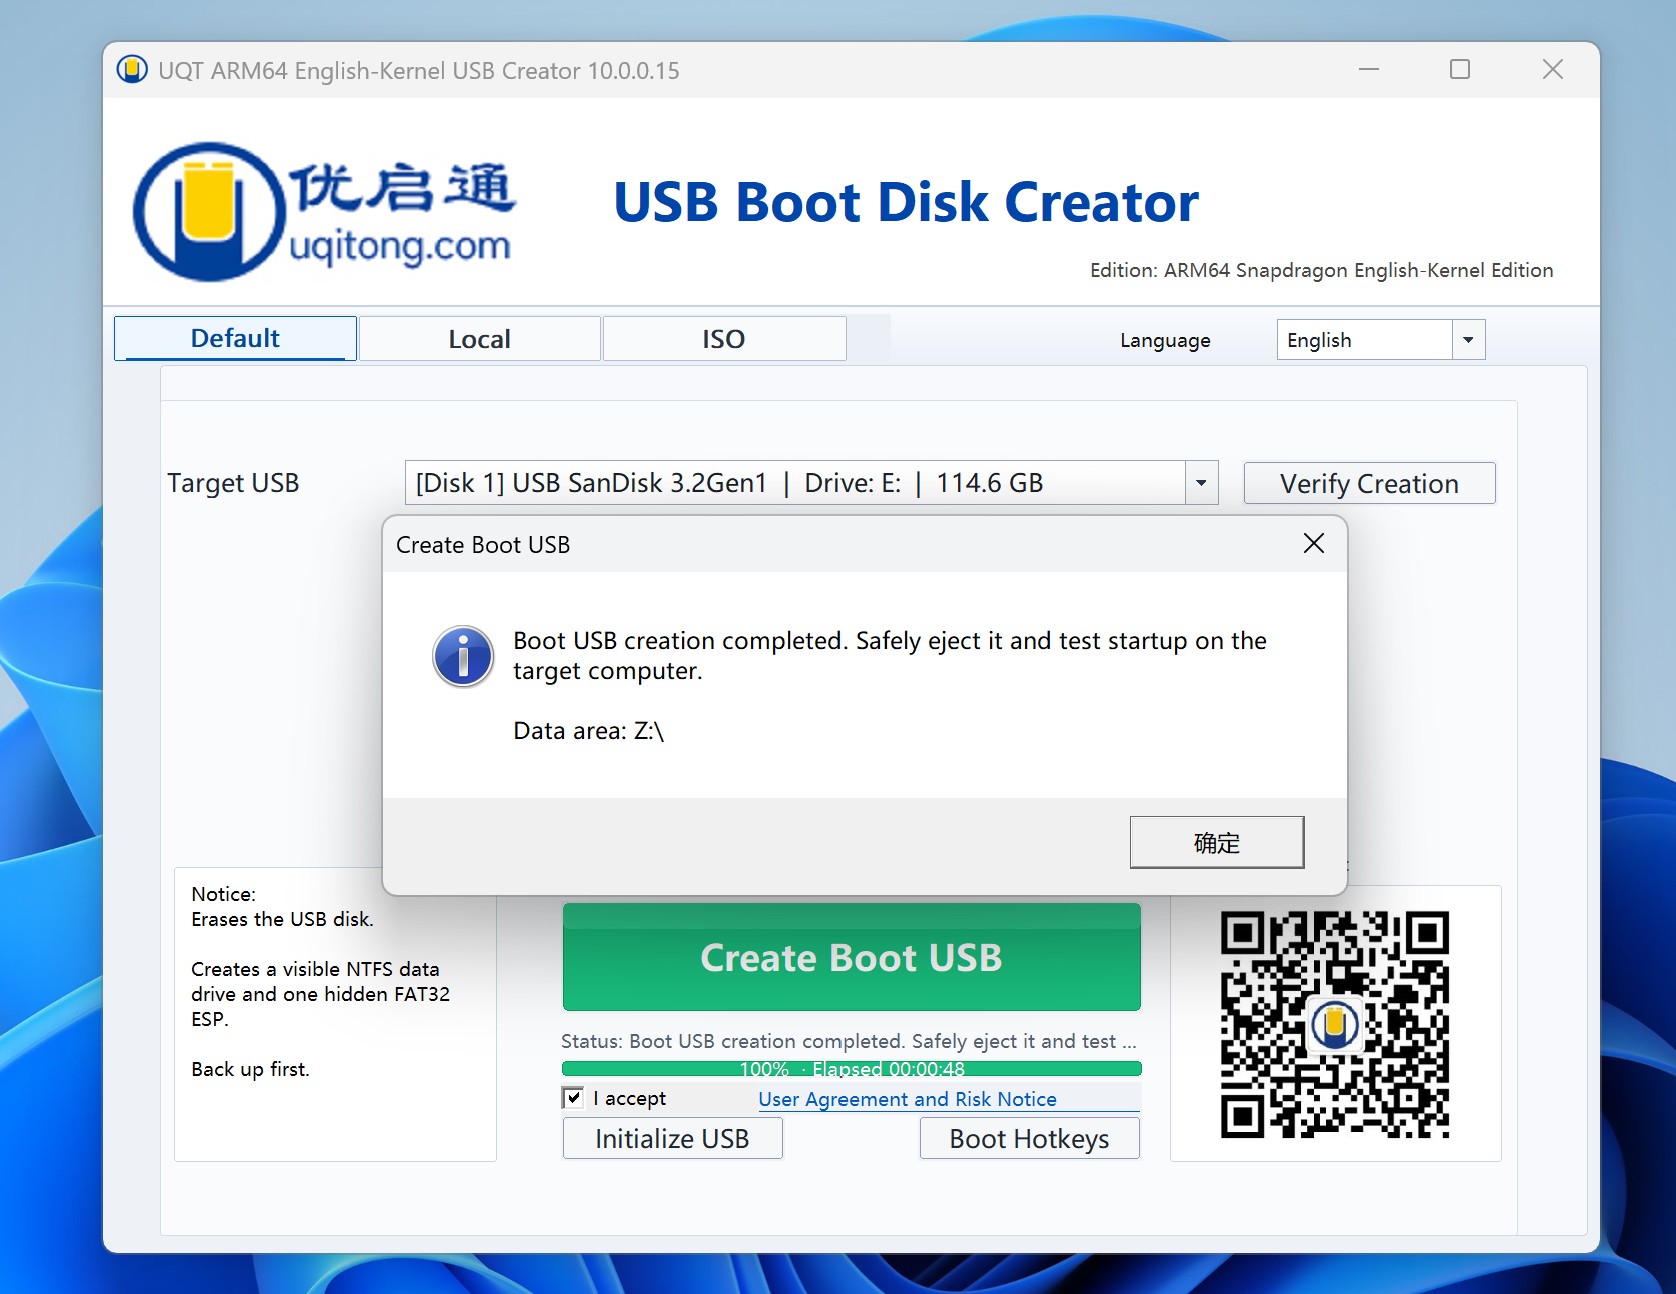
Figures 1–4 preserve the real English-edition 10.0.0.15 interface and write process. The current download was 10.0.0.16 when this guide was published; its Default-mode layout, primary controls, and operating sequence were checked before publication. If the official website later offers a newer version, follow the version shown in the current download section.
4. Verify Startup on the Snapdragon PC
1Open the one-time boot menu
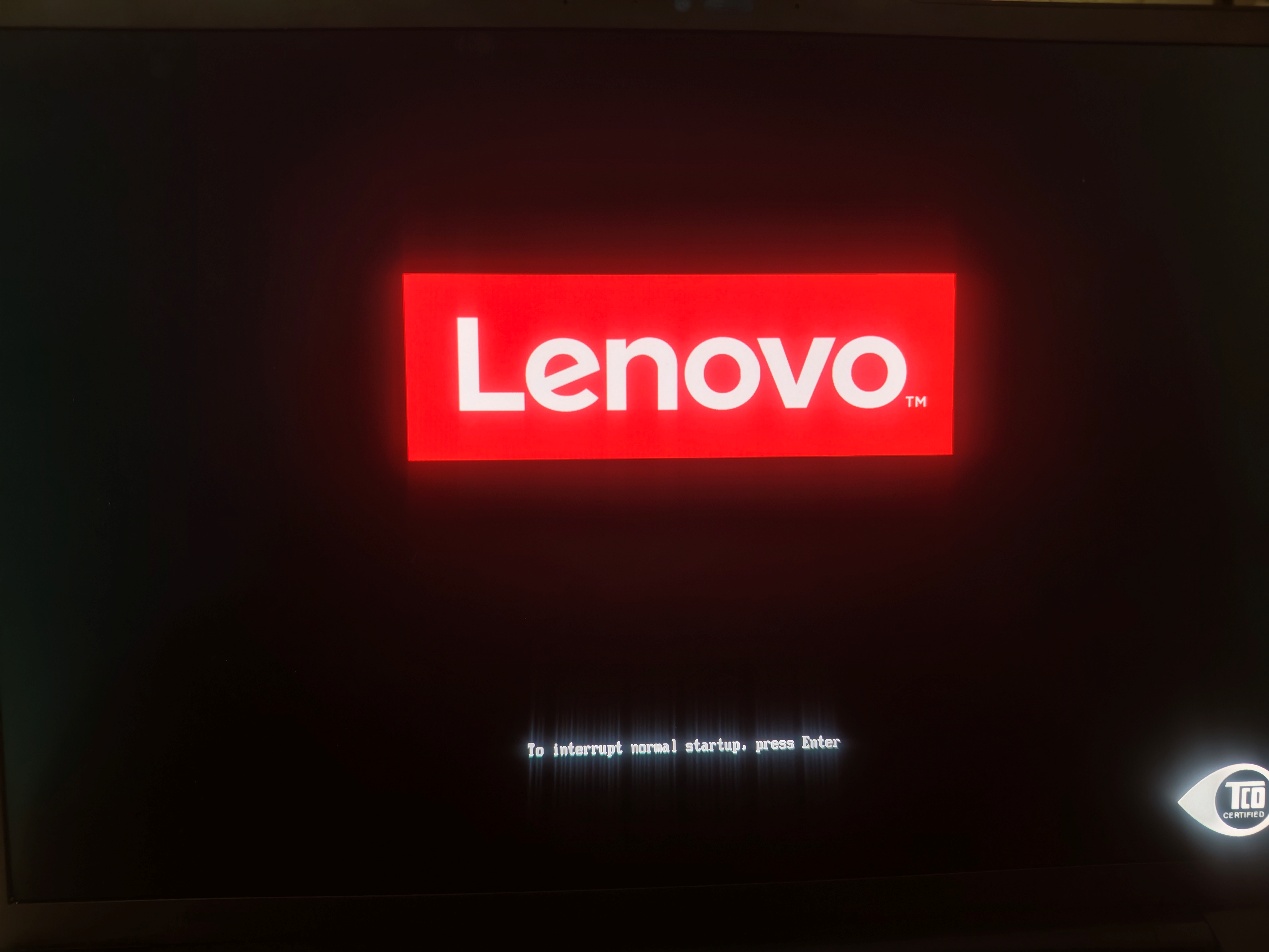
Safely eject the finished drive, connect it to the target Snapdragon PC, and connect AC power. Restart the PC and repeatedly press the model-specific one-time boot key when the manufacturer logo appears. Many Lenovo and ThinkPad models use F12; some first ask you to press Enter to interrupt normal startup and then F12 for the Boot Menu.
Other manufacturers may use F9, F11, F12, or Esc. You can open Boot Hotkeys in the creator or consult the PC manufacturer's documentation.
2Select the matching USB entry
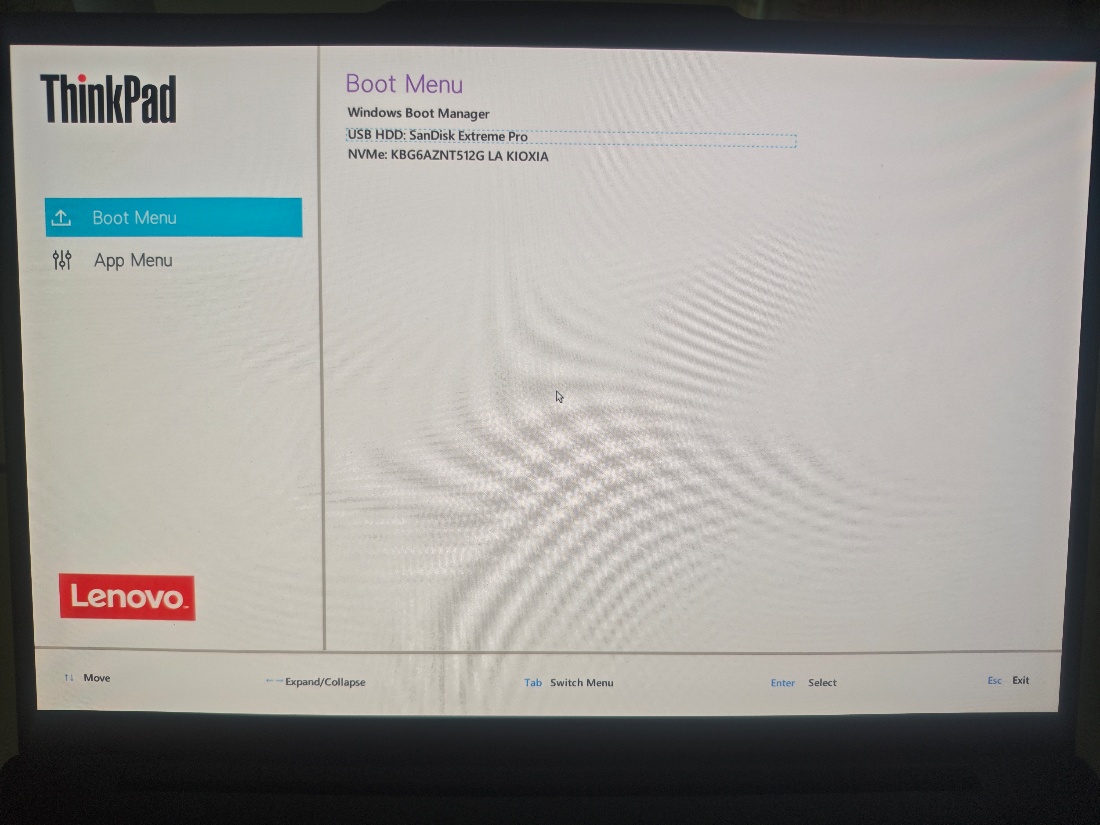
Choose the entry that matches the USB flash drive and press Enter. Its label may include USB, USB HDD, or the drive manufacturer's name. Do not choose Windows Boot Manager or the internal NVMe/SSD for this test.
3Confirm that uqitong ARM PE starts
A successful startup reaches the uqitong ARM PE desktop, where maintenance shortcuts such as system installation, boot repair, and partition tools are available. USB creation is fully verified only after this real startup succeeds.
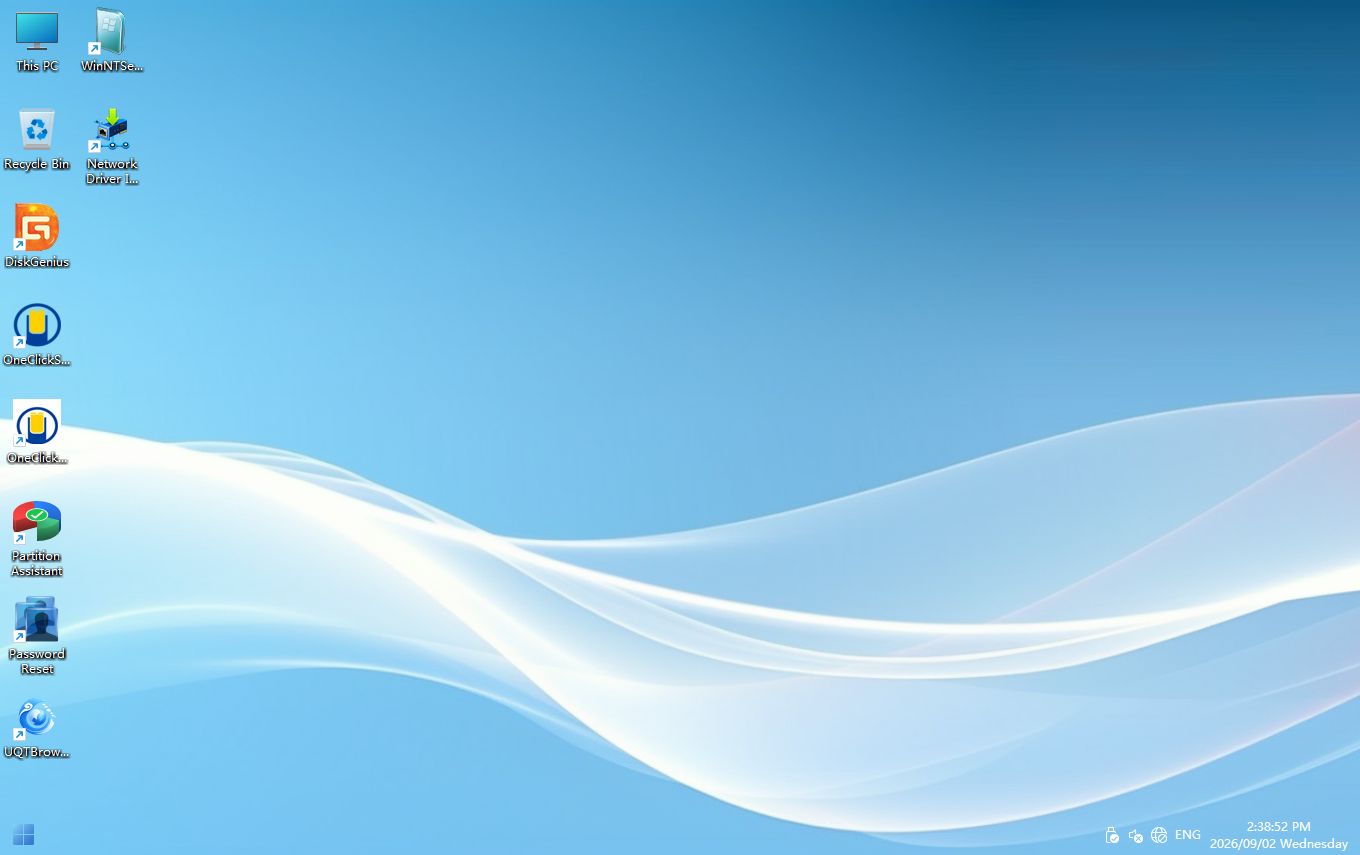
- The creator reports success
- The boot menu detects the USB drive
- The PC reaches uqitong ARM PE
5. Use the Finished Drive
- For maintenance only: no operating-system image has to be copied. Keep the boot files created by uqitong intact.
- To reinstall Windows: copy the correct Windows 11 ARM64 ISO, WIM, ESD, or SWM image to the visible NTFS data area, and then follow the uqitong ARM Windows 11 Reinstallation Guide. A normal x64 image for an Intel or AMD PC is not interchangeable with ARM64.
- To install Ubuntu: place the Ubuntu Desktop ARM64 ISO on a readable, non-BitLocker source and follow the uqitong ARM Ubuntu Installation Guide.
- For ordinary files: the visible data area can hold drivers, documents, and maintenance utilities, but important files still need another backup.
- To remove the drive: finish all file writes and use Windows Safely Remove Hardware and Eject Media before unplugging it.
- To update later: when a newer creator contains updated PE files, back up the visible data area and create the drive again with the current official release.
6. Troubleshooting
The creator does not list my USB drive
Reconnect it, try another USB port, and wait several seconds for the target list to update. If it is still absent, close and reopen the creator. Initialize USB may help with an abnormal old partition layout, but it also erases the entire selected device; use it only after confirming the exact target and backup.
Why does File Explorer show only one data drive?
That is expected. The creator makes a visible NTFS data area and a hidden FAT32 EFI System Partition. Windows normally does not assign a drive letter to the hidden boot partition.
Do I need a Windows or Ubuntu image just to create the drive?
No. Default mode writes uqitong ARM PE from the creator. An operating-system image is needed only when you later choose to install an operating system.
The boot menu does not show the USB drive
Reconnect the drive or try another USB port, then confirm that the creator reported successful completion. Use the PC manufacturer's UEFI boot instructions and correct one-time boot key. If you are unfamiliar with firmware settings, do not disable security features or change unknown options blindly.
Can I use this ARM drive on an Intel or AMD PC?
This creator and PE environment target Qualcomm Snapdragon ARM64 PCs. Use the uqitong x86/x64 edition for Intel or AMD hardware; boot environments and operating-system images for the two architectures are not interchangeable.
Do I need to disable antivirus protection or Windows Security?
Normally, no. Download only from the official uqitong website and keep Windows security protections enabled. If Windows blocks a file, verify its source, digital signature, and the exact warning instead of disabling protection blindly.
Does this procedure support every ARM PC?
No universal compatibility claim is implied. The startup shown here was verified on one ThinkPad T14s Gen 6 Snapdragon edition. Processor, firmware, USB controller, and hardware support can differ on other models.
Next step
If the PC can reach uqitong ARM PE from the USB drive, creation and startup verification are complete. Continue with the uqitong ARM Windows 11 Reinstallation Guide or the uqitong ARM Ubuntu Installation Guide; use the official uqitong ARM download section for current software and version information.